
There’s something truly primal, utterly satisfying, about cooking over an open flame, isn’t there? That smoky aroma curling through the air, the sizzle of food hitting hot grates, the way a simple ingredient transforms into something extraordinary with just a little heat and char – it’s pure magic. For me, the moment that first waft of barbecue smoke hits the neighborhood, it signals the unofficial start of summer, beckoning me to dust off the grill and dive headfirst into a season of delicious grilling recipes.
- Unlocking the Secrets to Perfect Grilled Mains
- Vibrant Vegetable Grilling Recipes: More Than Just a Side
- Sweet Endings: Grilled Fruit Delights
- Frequently Asked Questions About Grilling
- How do I prevent food from sticking to the grill grates?
- What’s the best way to know when meat is done without cutting into it?
- Should I marinate all my meats before grilling?
- How do I get good grill marks on my food?
- Can I grill frozen food?
- Beyond the Basics: Tips for Grilling Success
- Understanding Grill Zones
- Don’t Crowd the Grill
- Embrace the Rest
- Flavor Infusion: Smoke Chips and Wood Planks
- Clean Your Grill Immediately After Use
- Crafting Your Perfect BBQ Spread

Unlocking the Secrets to Perfect Grilled Mains
When it comes to the heart of any barbecue, the mains are where it’s at. They’re the stars of the show, the reason everyone gathers around the picnic table with anticipation. But how do you consistently achieve that ideal balance of tenderness, flavor, and that irresistible smoky char? It’s all about understanding your ingredients and mastering a few key techniques.Juicy Grilled Chicken Thighs with Herb Marinade
Chicken thighs are a grill whisperer’s dream. They’re forgiving, flavorful, and incredibly versatile. The key to making them sing on the grill is a good marinade that both tenderizes and infuses them with flavor. This herb-packed concoction is bright, zesty, and creates an incredible crust.Ingredients for the Marinade:
- ½ cup olive oil
- ¼ cup fresh lemon juice
- 2 tablespoons chopped fresh rosemary
- 2 tablespoons chopped fresh oregano
- 1 tablespoon minced garlic
- 1 teaspoon Dijon mustard
- ½ teaspoon black pepper
- 1 teaspoon sea salt
For the Chicken:
- 8 boneless, skinless chicken thighs
- Additional salt and pepper to taste
- Fresh parsley, chopped, for garnish (optional)
Making the Magic Happen:
- In a medium bowl, whisk together all marinade ingredients until well combined.
- Pat the chicken thighs dry with paper towels. Place them in a large freezer bag or a non-reactive dish. Pour the marinade over the chicken, ensuring each piece is fully coated. Seal the bag or cover the dish, then refrigerate for at least 30 minutes, or up to 4 hours for deeper flavor.
- Preheat your grill to medium-high heat (about 400-450°F / 200-230°C). Lightly oil the grill grates to prevent sticking.
- Remove chicken from the marinade, letting any excess drip off. Discard the remaining marinade.
- Place chicken thighs on the preheated grill. Cook for 6-8 minutes per side, or until the internal temperature reaches 165°F (74°C) with an instant-read thermometer. You’re looking for beautiful grill marks and no pink in the center.
- Tip: Resist the urge to constantly move the chicken. Let it sear undisturbed for the first few minutes to develop that gorgeous crust.
- Once cooked, transfer the chicken to a clean platter and tent loosely with foil. Let it rest for 5 minutes before serving. Garnish with fresh parsley if desired.
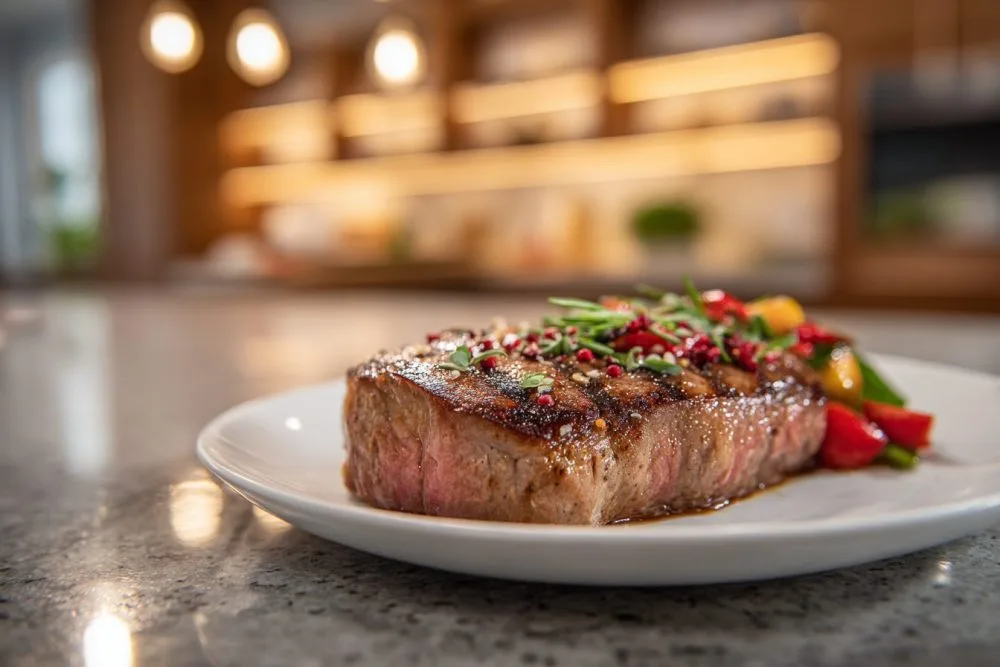
Perfectly Seared Sirloin Steaks
A good sirloin steak, when grilled correctly, is a thing of beauty. It’s flavorful, relatively lean, and takes to high heat like a champ. The trick here is in the prep and the timing.What You’ll Need:
- 2 (1-inch thick) sirloin steaks, about 1-1.5 lbs total
- 1 tablespoon olive oil
- 1 teaspoon coarse sea salt
- ½ teaspoon freshly ground black pepper
- 1 tablespoon unsalted butter (optional, for finishing)
- Fresh thyme sprigs (optional, for aroma)
Grilling Your Sirloin:
- Remove steaks from the refrigerator about 30-45 minutes before grilling to allow them to come closer to room temperature. This promotes more even cooking.
- Pat the steaks completely dry with paper towels. Drizzle with olive oil and rub all over. Season generously with sea salt and black pepper on both sides.
- Preheat your grill to high heat (450-500°F / 230-260°C). You want screaming hot grates for a good sear.
- Place steaks directly over the hottest part of the grill. Sear for 2-3 minutes per side for a beautiful crust.
- Reduce heat to medium-high or move steaks to a slightly cooler part of the grill. Continue cooking, flipping every 1-2 minutes, until desired doneness is reached.
- Use an instant-read thermometer for precision:
- Rare: 125-130°F (52-54°C)
- Medium-Rare: 130-135°F (54-57°C)
- Medium: 135-140°F (57-60°C)
- Once cooked, transfer steaks to a cutting board. Top with a pat of butter and a sprig of thyme if using. Tent loosely with foil and rest for at least 5-10 minutes. This is crucial for juicy steaks, allowing the juices to redistribute.
- Slice against the grain and serve immediately.

Vibrant Vegetable Grilling Recipes: More Than Just a Side
Don’t relegate vegetables to an afterthought! Grilled veggies can be incredibly flavorful, developing a sweetness and char that raw or roasted versions simply can’t match. They add color, texture, and a healthy balance to your barbecue spread.Rainbow Vegetable Skewers with Lemon-Herb Vinaigrette
Skewers are fantastic because they allow for even cooking and a beautiful presentation. This recipe uses a bright, tangy vinaigrette to make the vegetables truly pop.For the Skewers:
- 1 large red bell pepper, cut into 1-inch pieces
- 1 large yellow bell pepper, cut into 1-inch pieces
- 1 medium red onion, cut into 1-inch pieces
- 1 large zucchini, cut into ½-inch thick half-moons
- 1 cup cherry tomatoes
- 8-10 cremini mushrooms, stems trimmed
- 12 wooden or metal skewers (if using wooden, soak in water for 30 minutes)
For the Lemon-Herb Vinaigrette:
- ¼ cup olive oil
- 2 tablespoons fresh lemon juice
- 1 teaspoon dried oregano
- ½ teaspoon dried thyme
- ½ teaspoon garlic powder
- ¼ teaspoon salt
- ⅛ teaspoon black pepper
Assembling Your Skewers:
- Prepare the vinaigrette: In a small bowl, whisk together all vinaigrette ingredients until emulsified. Set aside.
- Thread the prepared vegetables onto the skewers, alternating colors and shapes for visual appeal. Try not to pack them too tightly, as this helps with even cooking.
- Arrange the skewers in a shallow dish and brush generously with about half of the vinaigrette. Let them sit for 15 minutes while the grill preheats.
- Preheat your grill to medium heat (375-400°F / 190-200°C). Lightly oil the grates.
- Place skewers on the grill. Cook for 8-12 minutes, turning every 2-3 minutes, until the vegetables are tender-crisp and have nice char marks.
- Note: Smaller vegetables like cherry tomatoes will cook faster, so place them towards the center of the skewer to prevent overcooking.
- Remove from grill, transfer to a platter, and drizzle with the remaining vinaigrette just before serving.
Sweet and Smoky Grilled Corn on the Cob
Forget boiling! Grilling corn brings out its natural sweetness and adds a fantastic smoky flavor. A little butter and seasoning are all you need.What You’ll Need:
- 6 ears of fresh corn on the cob, husks removed
- 2 tablespoons unsalted butter, melted
- ½ teaspoon smoked paprika
- ¼ teaspoon salt
- Pinch of cayenne pepper (optional, for a kick)
- Fresh lime wedges, for serving
Grilling the Corn:
- Preheat grill to medium-high heat (about 400°F / 200°C).
- In a small bowl, combine melted butter, smoked paprika, salt, and cayenne pepper (if using).
- Brush the corn ears all over with the seasoned butter mixture.
- Place corn directly on the hot grill grates. Cook for 10-15 minutes, turning every few minutes, until kernels are tender and slightly charred in spots.
- Remove from grill and serve immediately with fresh lime wedges for an extra burst of flavor.

Sweet Endings: Grilled Fruit Delights
Yes, you can grill fruit! The heat caramelizes its natural sugars, intensifying the sweetness and adding a beautiful smoky dimension. It’s a surprisingly simple yet elegant way to finish a barbecue meal.Caramelized Grilled Pineapple with Coconut Cream
This is a showstopper. Pineapple, with its vibrant acidity and sweetness, is absolutely stellar on the grill. The coconut cream adds a touch of creamy indulgence without being overly heavy.Ingredients:
- 1 ripe pineapple, cored and cut into ½-inch thick rings or wedges
- 2 tablespoons melted unsalted butter
- 2 tablespoons brown sugar
- Pinch of cinnamon (optional)
- For the Coconut Cream:
- 1 (13.5-ounce) can full-fat coconut milk, chilled in the refrigerator overnight
- 1 tablespoon powdered sugar (or to taste)
- ½ teaspoon vanilla extract
- Fresh mint leaves, for garnish (optional)
Getting Your Grill On:
- First, make the coconut cream. Carefully open the chilled can of coconut milk without shaking it. Scoop out the thick cream that has solidified at the top into a cold bowl. Leave the watery liquid behind (save it for a smoothie!).
- Add powdered sugar and vanilla extract to the coconut cream. Using an electric mixer, beat on high speed until light and fluffy, about 2-3 minutes. Cover and refrigerate until ready to serve.
- Preheat your grill to medium heat (350-400°F / 175-200°C). Lightly oil the grates.
- In a small bowl, combine melted butter, brown sugar, and cinnamon (if using). Brush generously over both sides of the pineapple slices.
- Place pineapple on the preheated grill. Cook for 2-4 minutes per side, until golden brown, caramelized, and tender.
- Remove from grill. Serve warm with a dollop of the whipped coconut cream and a sprinkle of fresh mint.
Frequently Asked Questions About Grilling
Got questions about mastering your grill? You’re not alone! Here are some common queries I hear all the time.How do I prevent food from sticking to the grill grates?
There are two main keys! First, ensure your grill grates are clean. Use a sturdy wire brush to scrape off any old food residue. Second, make sure your grates are hot before you place food on them, then brush them with a high smoke point oil (like canola or grapeseed oil) right before adding your ingredients. A paper towel soaked in oil and held with tongs works perfectly.
What’s the best way to know when meat is done without cutting into it?
An instant-read meat thermometer is your best friend! It’s the most accurate way to check for doneness without losing precious juices. Insert the thermometer into the thickest part of the meat, avoiding bones. Look for the target internal temperatures (e.g., 165°F for chicken, 130-140°F for medium beef).
Should I marinate all my meats before grilling?
Not necessarily all, but many benefit! Marinades add flavor and can help tenderize, especially with tougher cuts. However, some meats, like a high-quality steak, are often best with just a simple salt and pepper seasoning to let their natural flavors shine. Delicate fish might only need a quick oil and herb rub.
How do I get good grill marks on my food?
High heat is crucial for those beautiful sear marks. Make sure your grill is hot, and don’t move the food too soon. Let it sit undisturbed for 2-4 minutes per side to allow the maillard reaction (browning) to occur. For crosshatch marks, turn the food 90 degrees after the first set of marks develops, then flip and repeat on the other side.
Can I grill frozen food?
It’s generally not recommended for safety and quality reasons. Frozen foods, especially meats, won’t cook evenly on the grill – the outside might burn before the inside thaws and cooks through. Always thaw food completely in the refrigerator before grilling for the best results and safest consumption.
Beyond the Basics: Tips for Grilling Success
Grilling is more than just cooking; it’s an experience. And like any good experience, a little foresight and understanding can make all the difference. Here are a few extra nuggets of wisdom I’ve picked up over years of standing by the flames.Understanding Grill Zones
This is a game-changer for control. Most grills have hotter and cooler spots. Learn where yours are! For gas grills, you can create direct (over burners) and indirect (burners off) heat zones. For charcoal, pile coals on one side for direct heat and leave the other side empty for indirect. This allows you to sear over high heat, then move food to a cooler zone to cook through without burning.
Don’t Crowd the Grill
It’s tempting to try and fit everything on at once, especially when you’re hungry. But resist! Crowding the grill lowers the overall temperature, steams the food instead of searing it, and prevents those beautiful grill marks. Cook in batches if necessary, ensuring there’s enough space around each piece for proper airflow and heat.
Embrace the Rest
For meats, resting after grilling is non-negotiable. It allows the juices, which have rushed to the center during cooking, to redistribute throughout the meat. Cutting into it too soon will result in a dry, less flavorful experience. Five to ten minutes, tented loosely with foil, is usually sufficient for most cuts.
Flavor Infusion: Smoke Chips and Wood Planks
Want to take your grilling to the next level? Experiment with smoke chips (soaked in water for 30 minutes) or grilling planks. Cedar planks for salmon are a classic, but you can use them for vegetables or even cheese. Different wood chips (hickory, apple, cherry) impart distinct flavors, adding another layer of complexity to your grilling recipes.
Clean Your Grill Immediately After Use
I know, I know, it’s the last thing you want to do after a delicious meal. But cleaning your grill while it’s still warm (not scorching hot!) makes the job infinitely easier. Food residue loosens up, and a quick scrub with a wire brush will leave your grates ready for the next adventure. This also prevents stuck-on bits from imparting off-flavors to your next cookout.
Crafting Your Perfect BBQ Spread
As you can see, the world of grilling recipes extends far beyond the familiar. By incorporating a variety of mains, playing with different vegetables, and even venturing into the delightful realm of grilled fruits, you can transform any ordinary gathering into a memorable feast. The beauty of the grill lies in its versatility, allowing simple ingredients to shine with minimal fuss but maximum flavor.
So, the next time you’re planning an outdoor meal, think beyond the expected. Grab some fresh produce, a great cut of meat, and let the smoky magic happen. Experiment with new marinades, try different spice rubs, and don’t be afraid to char a piece of fruit or two. Each sizzle, each flip, each perfectly caramelized bite is a testament to the joy of cooking outdoors.
Happy grilling, my friends. May your grates be hot and your meals be delicious!

Featured Grilling Recipes: Chicken, Steak, Veggies & Fruit
A comprehensive collection of 30 grilling recipes for flavorful mains, vibrant vegetables, and sweet fruits perfect for any BBQ.
📝 Ingredients
👩🍳 Instructions
-
1For Grilled Chicken Thighs: In a bowl, whisk together ½ cup olive oil, ¼ cup lemon juice, rosemary, oregano, garlic, Dijon, 1 tsp salt, and ½ tsp pepper. Marinate chicken thighs for 30 mins to 4 hours in this mixture. Preheat grill to medium-high (400-450°F). Grill chicken 6-8 minutes per side, until internal temp reaches 165°F. Rest 5 mins.
-
2For Seared Sirloin Steaks: Remove steaks from fridge 30-45 mins before grilling. Pat dry, rub with 1 tbsp olive oil, season with 1 tsp coarse sea salt and ½ tsp black pepper. Preheat grill to high (450-500°F). Sear steaks 2-3 minutes per side for crust, then move to medium-high heat and cook to desired doneness (e.g., 130-135°F for medium-rare). Rest 5-10 mins tented with foil.
-
3For Rainbow Vegetable Skewers: Whisk together ¼ cup olive oil, 2 tbsp lemon juice, dried oregano, thyme, garlic powder, ¼ tsp salt, and ⅛ tsp pepper for vinaigrette. Thread bell peppers, onion, zucchini, tomatoes, and mushrooms onto skewers. Brush with half the vinaigrette. Preheat grill to medium (375-400°F). Grill skewers 8-12 minutes, turning, until tender-crisp. Drizzle with remaining vinaigrette.
-
4For Sweet and Smoky Grilled Corn: Preheat grill to medium-high (400°F). Melt 2 tbsp butter, stir in smoked paprika and ¼ tsp salt. Brush corn ears with seasoned butter. Grill corn 10-15 minutes, turning, until tender and lightly charred. Serve with lime wedges.
-
5For Caramelized Grilled Pineapple: For coconut cream: Scoop solidified cream from chilled coconut milk can into a cold bowl. Beat with 1 tbsp powdered sugar and ½ tsp vanilla until fluffy. Refrigerate. Preheat grill to medium (350-400°F). Combine 2 tbsp melted butter, brown sugar, and cinnamon. Brush over pineapple slices. Grill 2-4 minutes per side until caramelized. Serve warm with coconut cream.
💡 Notes
Always preheat your grill thoroughly and clean grates for best results. Use an instant-read thermometer for accurate meat doneness. Resting meat after grilling is crucial for juiciness. For wooden skewers, soak them in water for at least 30 minutes to prevent burning.


