I still remember the first time I made these no-bake keto chocolate crunch bars. It was late, I was utterly wiped out after a particularly long day, and all I could think about was something sweet, something chocolatey, something with that satisfying “snap.” I wanted convenience, but I refused to compromise on flavor or my low-carb goals. What started as a desperate pantry raid quickly turned into a love affair with these incredibly simple, utterly delightful no bake keto crunch bars.
- Why These Keto Crunch Bars Are a Total Game-Changer
- Gather Your Goodies: What You’ll Need
- Whipping Up Your Wonderful Crunch Bars: Step-by-Step
- Step 1: Prep Your Pan
- Step 2: Melt the Magic
- Step 3: Sweeten and Stir (If Needed)
- Step 4: The Crunch Factor
- Step 5: Press and Chill
- Step 6: Slice and Savor
- Common Curious Questions About Crunch Bars
- Can I make these vegan?
- How do I store these no-bake keto crunch bars?
- My bars aren’t crunchy enough, what went wrong?
- Can I use a different type of fat instead of coconut oil?
- What if I don’t have a specific low-carb cereal?
- Fueling Your Day: Nutrition at a Glance
Why These Keto Crunch Bars Are a Total Game-Changer
Let’s be real, the world of “healthy” desserts can sometimes feel like a minefield of compromises. Dry textures, weird aftertastes, or just plain blandness often leave us wishing we’d just stuck to a piece of fruit. But these aren’t those desserts. These are the real deal, echoing the joyful crunch of those classic chocolate bars from childhood, but without any of the sugar or guilt. They’re also incredibly versatile, fitting into multiple dietary needs with ease.The Magic Behind the Mouthfeel
The secret to that irresistible crunch lies in the choice of a specific low-carb cereal. Not all puffed cereals are created equal, especially when it comes to keeping things keto-friendly. We’re looking for something light, airy, and neutral in flavor that will absorb the rich chocolate coating without becoming soggy. This isn’t just about taste; it’s about recreating that beloved textural experience that makes a crunch bar, well, a *crunch* bar. Getting that perfect balance between solid chocolate and airy crisp is key to avoiding a dense, heavy treat.A Recipe That Respects Your Time (and Your Diet!)
One of the biggest hurdles for anyone trying to maintain a particular way of eating is time. Who has hours to spend in the kitchen crafting intricate desserts? Not me, and probably not you either. That’s precisely why this recipe shines. From start to finish, you’re looking at about 5 minutes of active preparation. The rest is just chill time, letting the freezer do its work. It’s ideal for meal prep, a quick afternoon snack, or even a last-minute dessert when unexpected guests arrive. Plus, knowing exactly what’s in your treat gives you peace of mind, something you rarely get from store-bought options.Gather Your Goodies: What You’ll Need
One of the beautiful things about this recipe is its simplicity. You don’t need a pantry full of obscure ingredients or fancy equipment. Just a few key players will get you to chocolatey, crunchy bliss.The Essential Elements
Sugar-Free Chocolate Chips: This is the backbone of our bars. Look for brands sweetened with erythritol, stevia, or monk fruit. My personal favorite are Lily’s dark chocolate chips, but use whatever sugar-free chocolate you enjoy. The quality of your chocolate will directly impact the final taste, so don’t skimp here if you can help it. Coconut Oil: This helps create that perfect melting consistency for the chocolate and also adds a lovely sheen and subtle flavor. If you’re not a fan of coconut, refined coconut oil has a neutral taste, or you can substitute with cocoa butter for an even richer, firmer bar (though it might require slightly more melting effort). Creamy Nut Butter: Almond butter is my go-to for its smooth texture and mild flavor that lets the chocolate shine. You could also use cashew butter or even a smooth peanut butter if you’re not strictly paleo. Just ensure it’s natural, with no added sugars or oils. This adds a lovely richness and helps bind everything together. Low-Carb Crispy Cereal: This is where the crunch comes from! Brands like Cereal School, Magic Spoon, or even some puffed rice cereals (check net carbs carefully!) can work. The goal is something light and airy that won’t become chewy or dense. Some brands even make dedicated keto ‘puffs’ that are perfect. Sweetener of Choice (Optional): Depending on your chocolate chips and personal preference, you might want a tiny dash of powdered erythritol or monk fruit sweetener to adjust the sweetness. Taste as you go!
Optional Flavor Boosters
While the basic recipe is fantastic on its own, a few additions can take these keto chocolate crunch bars to the next level: Vanilla Extract: A tiny splash enhances the chocolate flavor beautifully. Sea Salt Flakes: A sprinkle on top before freezing provides a sophisticated sweet-and-salty contrast. MCT Oil: For an extra dose of healthy fats and brain fuel, a tablespoon can be added to the melted chocolate mixture. It also helps with the texture. Chopped Nuts or Seeds: A handful of chopped pecans, walnuts, or pumpkin seeds can add another layer of texture and healthy fats.Whipping Up Your Wonderful Crunch Bars: Step-by-Step
Alright, let’s get these delicious morsels made! You’ll be amazed at how quickly this comes together. Get ready for some serious satisfaction.Step 1: Prep Your Pan
Start by lining a small square baking pan (an 8×8 inch or even a loaf pan for thicker bars) with parchment paper. Leave a slight overhang on the sides – this makes it super easy to lift the finished bars out later. A little foresight here saves a lot of frustration!Step 2: Melt the Magic
Grab a microwave-safe bowl. Add your sugar-free chocolate chips, coconut oil, and nut butter. Pop it into the microwave for 30-second intervals, stirring well after each, until the mixture is completely smooth and glossy. Alternatively, you can use a double boiler over very low heat for a more gentle melt. Tip: Don’t overheat the chocolate! Low and slow is the way to go to prevent it from seizing or becoming grainy.Step 3: Sweeten and Stir (If Needed)
Once your chocolate mixture is silky smooth, give it a taste. If you prefer it a little sweeter, now’s the time to stir in your optional powdered sweetener and vanilla extract. Whisk thoroughly until everything is fully incorporated.Step 4: The Crunch Factor
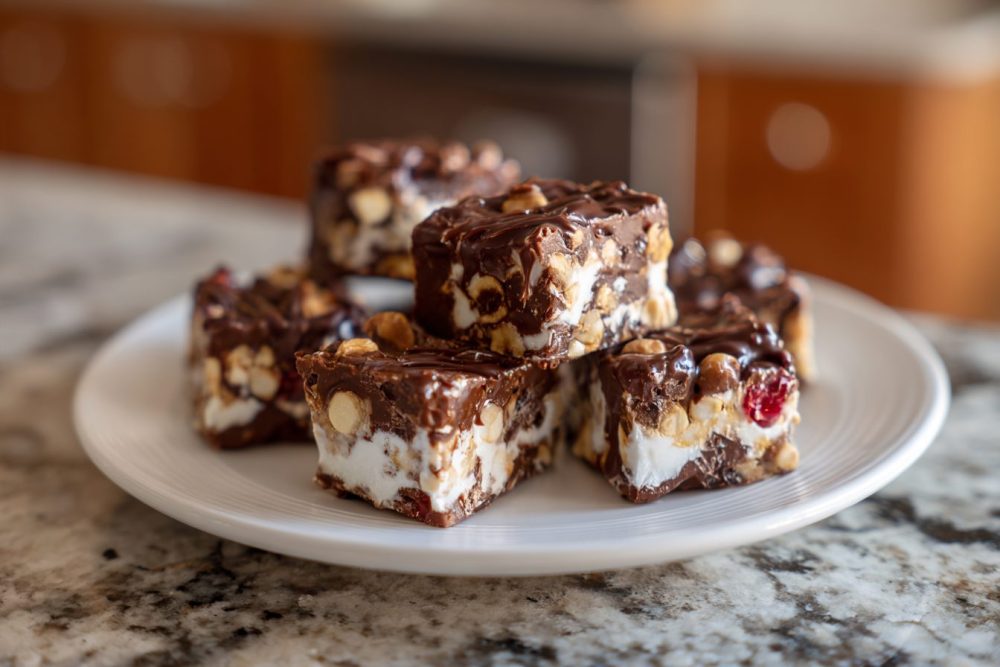
Now for the fun part! Gently fold in your low-carb crispy cereal into the melted chocolate mixture. Make sure every single piece of cereal is coated evenly. You want that delightful crunch in every bite! Be careful not to crush the cereal too much during this process.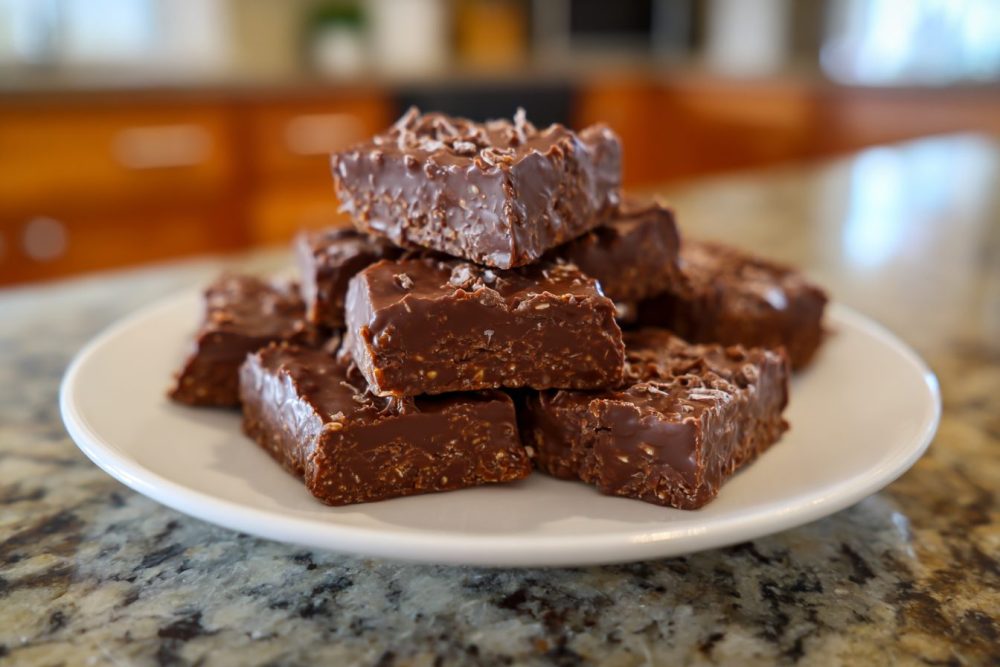
Step 5: Press and Chill
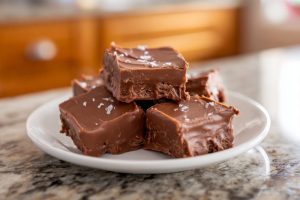
Pour the cereal-chocolate mixture into your prepared pan. Use the back of a spoon or a spatula to press it down firmly and evenly. Compact it well – this ensures your bars hold together when cut. Slide the pan into the freezer for at least 30-60 minutes, or until the bars are completely firm. The colder, the better for that clean break!Step 6: Slice and Savor
Once fully chilled and firm, lift the entire block out of the pan using the parchment paper overhang. Place it on a cutting board and use a sharp knife to slice it into your desired bar size. I usually go for 12-16 squares, depending on how generous I’m feeling (or how quickly I want them to disappear!). Enjoy immediately, or store them for later.Common Curious Questions About Crunch Bars
You’ve got questions, I’ve got answers! Here are some of the most common things people ask about whipping up a batch of these glorious low-carb treats.Can I make these vegan?
Absolutely! This recipe is naturally vegan, provided you use a plant-based nut butter and ensure your sugar-free chocolate chips are dairy-free. Most high-quality sugar-free chocolate brands are plant-based, but always double-check the label for milk derivatives if it’s a strict requirement for you.How do I store these no-bake keto crunch bars?
For optimal freshness and crunch, store your bars in an airtight container in the refrigerator. They’ll stay fresh and perfectly crunchy for up to two weeks. If you prefer them firmer, you can also store them in the freezer for up to a month. Just let them thaw for a few minutes at room temperature before enjoying.My bars aren’t crunchy enough, what went wrong?
The most common culprit for less-than-crunchy bars is usually either the type of low-carb cereal used or not enough chilling time. Ensure your cereal is truly crispy and not something that might soften easily. Also, make sure the bars are thoroughly chilled and firm before cutting – this locks in that crisp texture. Humidity can also play a small role, so keep them covered.Can I use a different type of fat instead of coconut oil?
While coconut oil is ideal for its firming properties and flavor, you could experiment with cocoa butter for an even richer, more stable bar. Butter (if not vegan) could technically work, but it might result in a slightly softer bar at room temperature. I wouldn’t recommend liquid oils like olive oil or avocado oil, as they won’t set properly.What if I don’t have a specific low-carb cereal?
If you can’t find a dedicated low-carb crispy cereal, you have a few options. Some people use crushed pork rinds for crunch, though that will significantly change the flavor profile. Another option is a mix of chopped nuts and seeds, which will give you a different kind of crunch but still be delicious and low-carb. Just ensure whatever you choose is truly low in net carbs.Fueling Your Day: Nutrition at a Glance
It’s always good to know what you’re putting into your body, especially when you’re managing a specific diet. These crunch bars aren’t just delicious; they’re also packed with healthy fats and fiber, making them a satisfying and guilt-free snack.| Nutrient | Per Serving (estimated) |
|---|---|
| Calories | 180-220 kcal |
| Total Fat | 16-20g |
| Saturated Fat | 10-12g |
| Net Carbs | 2-4g |
| Fiber | 3-5g |
| Protein | 3-5g |
| Sugar | <1g |
Keto Chocolate Crunch Bars (No-Bake)
Indulge in these easy, no-bake keto chocolate crunch bars. Sugar-free, low-carb, and ready in minutes!
📝 Ingredients
👩🍳 Instructions
-
1Line an 8x8 inch square baking pan (or a similar sized loaf pan for thicker bars) with parchment paper, leaving an overhang on the sides for easy removal.
-
2In a microwave-safe bowl, combine the sugar-free chocolate chips, melted coconut oil, and almond butter. Heat in 30-second intervals, stirring well after each, until the mixture is smooth and fully melted. Alternatively, melt over a double boiler.
-
3If using, stir in the vanilla extract and optional powdered sweetener until fully incorporated.
-
4Add the low-carb crispy cereal to the chocolate mixture. Gently fold until all the cereal pieces are evenly coated. Be careful not to crush the cereal too much.
-
5Pour the mixture into the prepared pan. Using the back of a spoon or a spatula, press the mixture down firmly and evenly into a compact layer.
-
6Place the pan in the freezer for at least 30-60 minutes, or until the bars are completely firm and set.
-
7Once firm, use the parchment paper overhang to lift the entire slab out of the pan. Place on a cutting board and, if desired, sprinkle with flaky sea salt. Use a sharp knife to cut into 12-16 individual bars or squares.
-
8Serve immediately, or store in an airtight container in the refrigerator for up to 2 weeks, or in the freezer for up to 1 month.
💡 Notes
For a richer flavor, use dark sugar-free chocolate chips. Ensure your nut butter is natural and unsweetened. To prevent bars from becoming too soft, keep them chilled. For extra healthy fats, add a tablespoon of MCT oil to the melted chocolate mixture.