
I still remember the first time I attempted to make a breakfast crunchwrap at home. It was a chaotic Saturday morning, eggs flying, cheese refusing to melt, and the tortilla — bless its heart — tearing into a thousand pieces. My husband walked into the kitchen, took one look at my flour-dusted face, and wisely suggested we just order takeout. But something about that crispy, golden exterior and savory interior haunted me. I knew I could conquer it.
Fast forward a few (okay, many) attempts, and I’ve finally cracked the code to the ultimate homemade breakfast crunchwrap. Forget those sad, soggy imitations. We’re talking about a portable, supremely satisfying morning meal that delivers on every front: flavor, texture, and that undeniable crunch. It’s perfect for those busy mornings when you need something substantial but don’t have time for a sit-down affair.
This recipe isn’t just about combining ingredients; it’s about technique, about coaxing out that perfect crisp, and about creating a truly crave-worthy experience right in your own kitchen. You’ll be surprised how simple it is to achieve once you know the little tricks.

Why This Crunchwrap Will Revolutionize Your Mornings
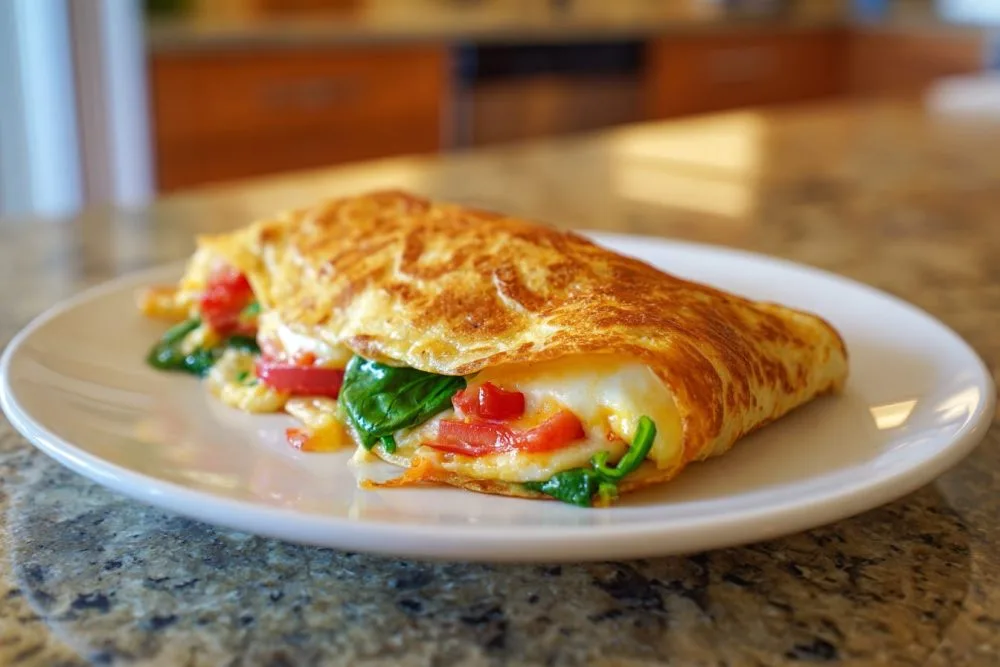
Let’s be honest, breakfast can sometimes feel like a chore. Cereal is quick but uninspired, and a full fry-up can be a production. That’s where the breakfast crunchwrap steps in, a true hero of the morning meal. It bundles all your favorite breakfast components — fluffy eggs, savory sausage or bacon, melty cheese, and even a hash brown — into one neat, toasted package.
The beauty of this particular crunchwrap isn’t just its convenience, though that’s certainly a major plus. It’s the balance of textures: the soft egg and cheese against the crispy hash brown, all encased in a golden, slightly chewy tortilla. It’s a complete meal, perfectly handheld, and utterly delicious. This recipe focuses on getting that exterior just right, a crucial element that elevates it from good to absolutely glorious.
The Secret to That Signature Crunch
You might be wondering how to get that signature crunch without deep-frying (because who needs that mess first thing in the morning?). The trick lies in a couple of key steps. Firstly, we’re using a large tortilla as our base, then a smaller one or even a tostada in the center to create that structural integrity and extra layer of crisp. Secondly, the cooking method itself is paramount. A hot, dry pan with a little oil, and a bit of patience, will yield that coveted golden-brown hue and satisfying crackle with every bite. It’s not just about cooking it through; it’s about slow-building that irresistible texture.
It also holds together beautifully, making it an ideal grab-and-go option. No more rogue eggs or spilling bacon bits! It’s all contained, making it perfect for eating in the car (carefully!), at your desk, or while wrangling little ones.
Gather Your Morning Fuel: What You’ll Need
Building the perfect breakfast crunchwrap starts with quality ingredients, but also understanding how each component contributes to the final masterpiece. Think of it like a breakfast symphony, where every instrument plays a crucial role.
For the Hearty Filling:
- Large Flour Tortillas: You’ll need 10-inch tortillas for the outer wrap and 8-inch tortillas (or tostadas/corn tortillas) for the inner layer. The size difference is key for folding.
- Eggs: Fresh, large eggs are best. Scramble them lightly; we’re not looking for a fully cooked omelet here, but soft, fluffy curds.
- Breakfast Sausage or Bacon: Cooked and crumbled sausage or crispy chopped bacon adds that essential savory depth. Vegetarian? Black beans or sautéed mushrooms work wonderfully.
- Shredded Cheese: Cheddar, Monterey Jack, or a Mexican blend melts beautifully and adds creaminess.
- Hash Brown Patties: The secret weapon for that extra crunch! Cook them until golden and crispy.
For Assembly & Finish:
- Olive Oil or Butter: For cooking your eggs and for toasting the crunchwrap. Butter adds an incomparable richness.
- Salt and Black Pepper: To season your eggs and bring out all the flavors.
- Optional Add-ins: Diced bell peppers, onions, spinach, salsa, hot sauce, avocado slices, or a dollop of sour cream can elevate your creation.

Crafting Your Crunchwrap: Step-by-Step Goodness
Don’t be intimidated by the folding process; it’s surprisingly intuitive once you get the hang of it. Think of it as wrapping a delicious present for your taste buds. The key is to not overfill, which can make folding tricky.
Prepping Your Components
- Cook the Meats: If using sausage, crumble and cook it in a skillet over medium heat until browned and cooked through. Drain any excess grease. For bacon, cook until crispy, then chop. Set aside.
- Scramble the Eggs: In the same skillet (or a separate one if you prefer), whisk your eggs with a pinch of salt and pepper. Cook over medium-low heat, stirring gently, until they are just set but still soft and fluffy. Don’t overcook them! Set aside.
- Crisp Those Hash Browns: Cook your hash brown patties according to package directions until they are deeply golden and crispy. You can use an air fryer, oven, or a non-stick skillet.
Assembling the Masterpiece
- Lay the Foundation: Place one large (10-inch) flour tortilla flat on a clean work surface.
- First Layer of Goodness: Spoon about a quarter of your scrambled eggs into the center of the large tortilla, leaving a good border.
- Add the Crunch: Place one cooked hash brown patty directly on top of the eggs.
- Cheese Please! Sprinkle a generous amount of shredded cheese over the hash brown and eggs.
- Savory Kick: Distribute a quarter of your cooked sausage or bacon over the cheese.
- The Inner Tortilla Seal: This is where the magic happens for structure and extra crunch! Place a smaller (8-inch) tortilla directly on top of the fillings. If you don’t have smaller tortillas, you can use a tostada or even a corn tortilla that’s been lightly toasted. This layer helps contain everything and makes folding easier.
- The Fold: Starting from any edge of the large tortilla, begin folding the edges inward towards the center, overlapping them neatly to create a sealed packet. You want to make sure all the fillings are enclosed. It should resemble a hexagon or octagonal shape.

The Golden Finish
- Heat the Pan: Heat a large non-stick skillet or griddle over medium heat. Add a teaspoon of olive oil or a pat of butter, ensuring it coats the bottom.
- Sear for the Crunch: Carefully place the folded crunchwrap seam-side down into the hot pan. This helps seal the folds. Cook for 3-4 minutes, or until the bottom is beautifully golden brown and crispy.
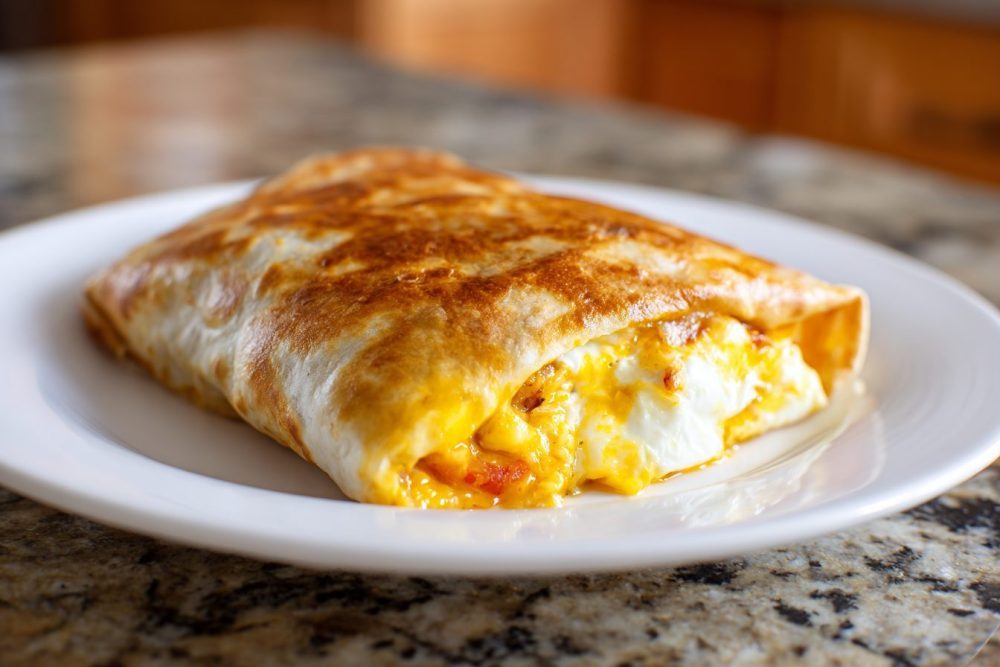
- Flip it! Gently flip the crunchwrap over and cook for another 3-4 minutes on the other side, until it’s also golden and the cheese inside is fully melted and gooey.
- Serve Immediately: Transfer your golden crunchwrap to a plate, cut it in half if desired, and serve while warm.
Tip: Don’t overcrowd your pan. Cook one crunchwrap at a time to ensure even browning and crisping. If you’re making several, you can keep the finished ones warm in a low oven (around 200°F / 95°C) on a baking sheet while you finish the rest.
Customizing Your Morning Masterpiece
The beauty of the breakfast crunchwrap is its incredible versatility. Consider this recipe a delicious blueprint, inviting you to experiment and make it truly your own. Don’t be afraid to stray from the path and inject your favorite flavors! Here are a few ideas to get you started:
Flavor Twists & Additions:
- Spicy Kick: Add a pinch of red pepper flakes to your eggs, mix in some diced jalapeños with your sausage, or drizzle with your favorite hot sauce before folding.
- Veggie Power: Sautéed bell peppers, onions, spinach, mushrooms, or even a spoonful of leftover roasted vegetables can be a fantastic addition. Just make sure they’re not too wet.
- Bean Boost: A thin layer of refried beans or seasoned black beans can add an extra layer of flavor and protein, making the crunchwrap even more substantial.
- Avocado Love: Sliced avocado or a dollop of guacamole added right before the inner tortilla layer brings a creamy, fresh element.
- Smoky Chipotle: Mix a little chipotle powder into your eggs or make a quick chipotle mayo to drizzle inside.
Protein Alternatives:
- Plant-Based Power: Swap the meat for seasoned black beans, crumbled tofu scramble, or a plant-based sausage patty.
- Carnivore’s Delight: Leftover shredded chicken or beef, thinly sliced deli ham, or even smoked salmon can find a happy home in this wrap.
The key is to maintain a good balance and not overstuff. A little bit of everything goes a long way in creating a harmonious bite. Think about contrasting textures and complementary flavors!
Smart Prep for Smoother Mornings
While the breakfast crunchwrap is relatively quick to assemble, there are certainly ways to streamline the process, especially if you’re making these for a crowd or want to enjoy them on hectic weekdays. A little foresight goes a long way in turning a good breakfast into a truly effortless one.
Make-Ahead Magic:
- Cook the Components: The eggs, sausage/bacon, and hash browns can all be cooked ahead of time. Store them separately in airtight containers in the refrigerator for up to 3-4 days.
- Assemble and Store: You can even assemble the entire crunchwrap (without cooking it in the pan) and wrap it tightly in plastic wrap. Keep it in the fridge for up to 24 hours. When ready to cook, unwrap and proceed with the pan-toasting step. This is a fantastic option for busy weekday mornings!
Reheating Tips:
If you have leftover cooked crunchwraps, or if you prepare them ahead of time and cook them fully, don’t despair! They reheat surprisingly well.
- Oven Method: For the best results, reheat in a preheated oven or toaster oven at 350°F (175°C) for 10-15 minutes, or until heated through and crispy. This helps revive that golden exterior.
- Skillet Method: You can also reheat them in a non-stick skillet over medium-low heat for 3-5 minutes per side, until warmed through and crisp.
- Microwave (Use with Caution): While technically possible, microwaving will make the tortilla soft and lose its crunch. It’s best reserved for emergencies when texture isn’t a priority.
Common Hiccups and How to Side-Step Them
Even the simplest recipes can have their little quirks. Learning from common mistakes is part of the cooking journey, and with breakfast crunchwraps, a few pointers can save you from a soggy situation or a broken wrap. Let’s make sure your crunchwrap experience is nothing short of perfect.
The Dreaded Soggy Tortilla:
This is probably the most common complaint, and it’s usually due to a few factors. Firstly, ensure your fillings aren’t overly wet. If you’re adding salsa, drain it well. Secondly, cooking it on too low heat or not long enough will prevent the tortilla from crisping up. Medium heat and patience are your best friends here. Don’t rush the process!
Overfilling Fiasco:
It’s tempting to cram in as much deliciousness as possible, but an overstuffed crunchwrap is difficult to fold and prone to bursting. Aim for a generous but manageable amount of filling that allows the large tortilla edges to meet and overlap comfortably. The inner tortilla should sit flat on the fillings, not bulge.
Uneven Browning:
If one side is golden and the other is pale, your pan might not be evenly heated. Make sure your skillet or griddle is fully preheated before placing the crunchwrap. Also, press down gently with a spatula after flipping to ensure good contact with the hot surface, promoting even browning. A consistent heat source makes all the difference.
Breaking During the Flip:
This usually happens if the crunchwrap hasn’t sealed properly or if it’s been overfilled. Ensure your folds are tight and the seam side is cooked first to “glue” it together. When flipping, use a wide, sturdy spatula and be confident with your motion. A quick, smooth flip is better than a hesitant, wobbly one.
By keeping these tips in mind, you’ll be cranking out perfectly golden, structurally sound, and utterly delicious breakfast crunchwraps every time. Practice makes perfect, and each attempt is a tasty reward!
FAQs About Your New Favorite Breakfast
Got questions? I’ve got answers! Here are some common queries that pop up when folks are diving into the delightful world of breakfast crunchwraps.
Can I use corn tortillas instead of flour for the outer wrap?
For the outer wrap, I strongly recommend a large flour tortilla. Corn tortillas are less pliable when cold and tend to crack when folded this way. However, a small, lightly toasted corn tortilla is an excellent substitute for the *inner* tortilla layer, adding another dimension of flavor and texture.
What if I don’t have hash brown patties?
No hash brown patties? No problem! You can use shredded hash browns (cooked until crispy) or even a thin layer of cooked tater tots. If you’re in a pinch, omitting it is fine, but you’ll miss that signature crunch. You could also make a thin potato pancake to fit in the middle.
Can I make these vegetarian or vegan?
Absolutely! For a vegetarian version, omit the sausage/bacon and add more veggies, black beans, or a plant-based breakfast sausage. For vegan, use a tofu scramble instead of eggs, plant-based cheese, and vegan breakfast sausage. Ensure your hash browns are also vegan-friendly.
How do I keep them warm if I’m making several?
The best way to keep multiple crunchwraps warm and maintain their crispness is to transfer them to a baking sheet and place them in a low oven (around 200°F / 95°C) while you cook the remaining ones. Avoid stacking them, as this can make them steamy and soft.
What are some good dipping sauces for a breakfast crunchwrap?
While delicious on their own, a dipping sauce can take your crunchwrap to the next level! My personal favorites include a classic salsa, a creamy avocado ranch, a spicy sriracha mayo, or even just a simple dollop of sour cream or Greek yogurt for tang. Experiment to find your perfect pairing!

Golden Crunchwrap Breakfast Bliss
Unlock the secret to the ultimate crispy, golden breakfast crunchwrap. Perfect for busy mornings!
📝 Ingredients
👩🍳 Instructions
-
1Prepare your fillings: Cook the breakfast sausage or bacon until done; drain excess fat and set aside. Scramble the eggs with a pinch of salt and pepper; if using milk, whisk it in. Cook until just set and fluffy, then set aside. Cook hash brown patties according to package directions until golden and crispy.
-
2Assemble the crunchwrap: Lay one large flour tortilla flat on a clean surface. Spoon about 1/4 of the scrambled eggs into the center of the large tortilla, leaving a wide border around the edges.
-
3Place one cooked hash brown patty directly on top of the eggs. Sprinkle 1/4 of the shredded cheese over the hash brown and eggs, followed by 1/4 of the cooked sausage or bacon.
-
4Place one smaller tortilla (or tostada) directly on top of the fillings. This acts as a structural layer and adds extra crunch.
-
5Begin folding the edges of the large tortilla inward, overlapping them to create a sealed packet. Work your way around until all the filling is enclosed and you have a neat, multi-sided package. The folds should be secure.
-
6Heat 1 teaspoon of olive oil or butter in a large non-stick skillet or griddle over medium heat. Once hot, carefully place the assembled crunchwrap, seam-side down, into the pan. This helps to 'glue' the folds together.
-
7Cook for 3-4 minutes, or until the bottom is beautifully golden brown and crispy. Gently flip the crunchwrap over and cook for another 3-4 minutes on the other side, until golden and the cheese inside is fully melted and gooey.
-
8Remove from the pan and serve immediately. Repeat with the remaining crunchwraps. Slice in half if desired and serve with your favorite toppings like salsa or hot sauce.
-
9Note: For a spicier kick, add a dash of hot sauce or a sprinkle of red pepper flakes to your eggs or fillings. Don't overfill the tortillas, as this makes folding difficult and prone to tearing.
💡 Notes
Leftover crunchwraps can be reheated in a toaster oven or skillet for best crispness. For meal prep, cook all components ahead, assemble, and refrigerate for up to 24 hours before cooking.


