
The smell of fresh bread, warm from the pan, is one of those simple pleasures that can instantly transport you to a happy place. For me, it often conjures up memories of bustling kitchens, Sunday mornings, and the comforting feeling of home. There’s something undeniably magical about transforming flour and water into something so utterly delicious, especially when you think you need a fancy oven to do it. Well, today, I’m here to tell you that’s simply not true! You can achieve bakery-quality results right on your stovetop.
- Why This Skillet Bread Method Works Wonders
- Essential Supplies for Your Skillet Bread Adventure
- Gather Your Wholesome Ingredients
- Mixing and Proofing Your Dough to Perfection
- Shaping and Cooking Your Golden Skillet Rounds
- Serving Suggestions and Flavor Boosters
- Common Questions About Skillet Bread
- Can I use whole wheat flour for this recipe?
- My bread isn’t puffing up. What went wrong?
- How do I store leftover Turkish bread?
- Can I make the dough ahead of time?
- What kind of skillet is best for this bread?
- Troubleshooting Your Skillet Bread
- Bread is too tough/dense:
- Bread is burning before cooking through:
- Bread is sticking to the pan:
- Bread isn’t browning nicely:
- A Final Thought on the Joys of Stovetop Baking

Why This Skillet Bread Method Works Wonders
The secret to this bread’s incredible texture and crispy exterior lies in direct heat. Unlike an oven, which bakes with ambient heat, a hot skillet provides intense, direct contact that causes the dough to puff up rapidly and develop a beautiful crust. This rapid cooking also helps to keep the interior incredibly soft and airy, preventing it from drying out. You get that satisfying chewiness of a good bread without the hassle of preheating a large oven, making it incredibly energy-efficient and perfect for warmer months when you don’t want to heat up your entire kitchen.Essential Supplies for Your Skillet Bread Adventure
You don’t need much to make this bread, which is part of its charm. A good, heavy-bottomed skillet is your most important tool. Cast iron is ideal because it retains heat so well and distributes it evenly, ensuring a consistent cook. If you don’t have cast iron, any sturdy non-stick pan will work, but you might need to adjust cooking times slightly. Beyond that, a large mixing bowl, a clean kitchen towel, and a rolling pin are pretty much all you’ll require. It’s a testament to how humble ingredients and basic tools can create something extraordinary.Gather Your Wholesome Ingredients
The magic of this No-Oven Turkish Bread comes from a few simple, everyday pantry staples. You won’t find any exotic flours or hard-to-source yeasts here. We’re keeping it traditional and accessible, ensuring you can whip up a batch whenever the craving strikes.For the Dough:
- All-Purpose Flour: The foundation of our bread. Use a good quality unbleached flour for the best results.
- Active Dry Yeast: This is what gives our bread its wonderful lift and airy texture. Make sure your yeast is fresh!
- Warm Water: Not too hot, not too cold. Think lukewarm bathwater – about 105-115°F (40-46°C) is perfect for activating the yeast.
- Granulated Sugar: Just a pinch to “feed” the yeast and help with browning.
- Fine Sea Salt: Crucial for flavor. Don’t skip it!
- Olive Oil: A touch of olive oil in the dough helps keep it tender and adds a lovely subtle flavor. It also prevents sticking during kneading.
For Cooking:
- More Olive Oil: For brushing the skillet. This helps with browning and prevents sticking.

Mixing and Proofing Your Dough to Perfection
Making the dough for this skillet bread is incredibly straightforward. Even if you’re new to bread making, you’ll find this forgiving and fun. The key is allowing enough time for the yeast to work its magic.Activating the Yeast:
In a large mixing bowl, combine the warm water, sugar, and active dry yeast. Give it a gentle swirl and let it sit for about 5-10 minutes. You’ll know your yeast is alive and happy when a foamy layer forms on top. If nothing happens, your water might have been too hot (killing the yeast) or too cold (slowing it down), or your yeast might be old. Start fresh if it doesn’t foam!
Bringing the Dough Together:
Once your yeast is active, add the olive oil and salt to the bowl. Gradually add the flour, about a cup at a time, mixing with a wooden spoon or your hands. Keep adding flour until a shaggy dough forms and it pulls away from the sides of the bowl. It might seem a little sticky at first, that’s okay.
Kneading for a Tender Crumb:
Turn the dough out onto a lightly floured surface. Knead for about 5-7 minutes. You’re looking for a smooth, elastic dough that springs back when gently poked. If it’s too sticky, add a tiny bit more flour, but be careful not to add too much, or your bread will be tough. Note: Resist the urge to add too much flour during kneading. A slightly tacky dough makes for a softer final product.
The First Rise:
Lightly grease the mixing bowl with a little olive oil. Place the dough in the bowl, turning it once to coat. Cover the bowl with a clean kitchen towel or plastic wrap. Let it rise in a warm, draft-free place for about 1 to 1.5 hours, or until it has doubled in size. This proofing time is crucial for developing flavor and creating that airy texture.
Shaping and Cooking Your Golden Skillet Rounds
Once your dough has had its beautiful rise, it’s time for the fun part: shaping and cooking! This is where you really start to see the No-Oven Turkish Bread come to life.Dividing the Dough:
Gently punch down the risen dough to release the air. Transfer it back to your lightly floured surface. Divide the dough into 6-8 equal pieces. The exact number depends on how large you want your bread rounds to be. I usually aim for 6 for slightly larger pieces, perfect for sandwiches.
Crafting the Rounds:
Take each piece of dough and roll it into a smooth ball. Then, using a rolling pin, flatten each ball into a round disc, about 1/4 inch thick. Aim for roughly 6-8 inches in diameter. Don’t worry if they’re not perfectly round; rustic charm is part of the appeal!
Second Proof (Short and Sweet):
Place the flattened dough rounds on a lightly floured baking sheet or a clean kitchen towel, ensuring they have a little space between them. Cover them lightly with another clean towel and let them rest for about 15-20 minutes. This short rest allows the gluten to relax, making the bread more tender and helping it puff up nicely in the skillet.

Cooking in the Skillet:
Heat a large, heavy-bottomed skillet (preferably cast iron) over medium-high heat. Once hot, brush it lightly with olive oil. Place one or two dough rounds in the hot skillet, making sure not to overcrowd the pan. Cook for 2-3 minutes per side. You’re looking for beautiful golden-brown spots and a puffy texture. The bread should expand and cook through without burning. Tip: Don’t be afraid to press down gently with a spatula if the edges aren’t making full contact with the pan. This helps achieve even browning.
As each piece finishes cooking, transfer it to a plate and cover it with a clean kitchen towel to keep it warm and soft while you cook the remaining pieces. This also helps to steam the bread slightly, contributing to its tender texture.
Serving Suggestions and Flavor Boosters
This No-Oven Turkish Bread is incredibly versatile. It’s a fantastic accompaniment to so many dishes, and you can easily dress it up or down depending on your meal.What to Pair It With:
- Dips & Spreads: It’s absolutely perfect for scooping up creamy hummus, vibrant baba ghanoush, or spicy muhammara.
- Soups & Stews: Tear off pieces to soak up rich lentil soup, a hearty lamb stew, or a comforting chicken noodle soup.
- Sandwiches & Wraps: Use it as a base for quick sandwiches with grilled halloumi, roasted vegetables, or leftover rotisserie chicken. It makes an excellent quick wrap for falafel or kebabs.
- Breakfast: Serve it warm with butter and jam, or alongside scrambled eggs and feta cheese for a complete breakfast.
- Simple Pleasure: Don’t underestimate the joy of simply enjoying a piece warm, drizzled with good quality olive oil and a sprinkle of za’atar or red pepper flakes.
Quick Flavor Twists:
Before cooking, you can brush the dough with a little garlic butter, sprinkle with sesame seeds, nigella seeds, or fresh herbs like parsley or dill. For a cheesy version, sprinkle a little grated mozzarella or feta on top of the dough before flipping it in the skillet.
Common Questions About Skillet Bread
Got a few lingering questions? Let’s tackle them. Making bread on the stovetop is a little different from traditional baking, so it’s natural to wonder about a few things.Can I use whole wheat flour for this recipe?
Yes, you can! You might need to adjust the water slightly, as whole wheat flour absorbs more liquid. Start by substituting up to half of the all-purpose flour with whole wheat. The texture will be a bit denser, but still delicious and wholesome.
My bread isn’t puffing up. What went wrong?
There are a few common culprits. The most likely is inactive yeast – ensure your yeast foams up nicely at the start. Another reason could be that your dough didn’t get enough proofing time, or your skillet wasn’t hot enough. Make sure your pan is properly preheated before adding the bread.
How do I store leftover Turkish bread?
Store cooled bread in an airtight container or a plastic bag at room temperature for up to 2-3 days. For longer storage, you can freeze individual pieces wrapped tightly in plastic wrap and then foil for up to 1 month. Thaw at room temperature and reheat gently in a dry skillet or toaster.
Can I make the dough ahead of time?
Absolutely! You can prepare the dough up to the first rise, then punch it down and place it in an oiled bowl, covered tightly, in the refrigerator for up to 24 hours. When you’re ready to cook, let it come to room temperature for about 30 minutes before dividing and shaping.
What kind of skillet is best for this bread?
A cast-iron skillet is truly the king for this recipe. Its even heat distribution and ability to retain high temperatures are unmatched. A heavy-bottomed non-stick skillet can also work, but lighter pans might not give you the same consistent browning or puff.
Troubleshooting Your Skillet Bread
Even experienced bakers have off days, so don’t fret if your first batch isn’t perfect. Bread making is a journey.Bread is too tough/dense:
This usually means too much flour was added during mixing or kneading, or the dough was over-kneaded. Next time, try to keep the dough slightly tacky. It could also mean insufficient proofing time, so give it more time to rise.
Bread is burning before cooking through:
Your skillet heat is too high. Reduce the flame to medium. The bread needs time to cook internally as the crust browns. If it’s too hot, the outside will char before the inside is done.
Bread is sticking to the pan:
Ensure you’re brushing the skillet with enough olive oil between each batch. If you’re using a non-stick pan, it might be losing its non-stick properties. A cast iron pan needs to be well-seasoned to prevent sticking.
Bread isn’t browning nicely:
Conversely, if your bread isn’t browning, your skillet might not be hot enough. Increase the heat slightly. Also, make sure there’s that tiny pinch of sugar in the dough, which helps with caramelization.
A Final Thought on the Joys of Stovetop Baking
There’s something incredibly gratifying about creating fresh bread with just a simple pan and a few ingredients. This No-Oven Turkish Bread recipe isn’t just about making bread; it’s about discovering the joy of simple, accessible cooking and the incredible flavors that emerge from time-honored techniques. It’s a versatile, delicious addition to any meal, and once you try it, you’ll wonder why you ever needed an oven for such perfection. So go ahead, fire up that skillet, and enjoy the aroma of homemade bread filling your kitchen!
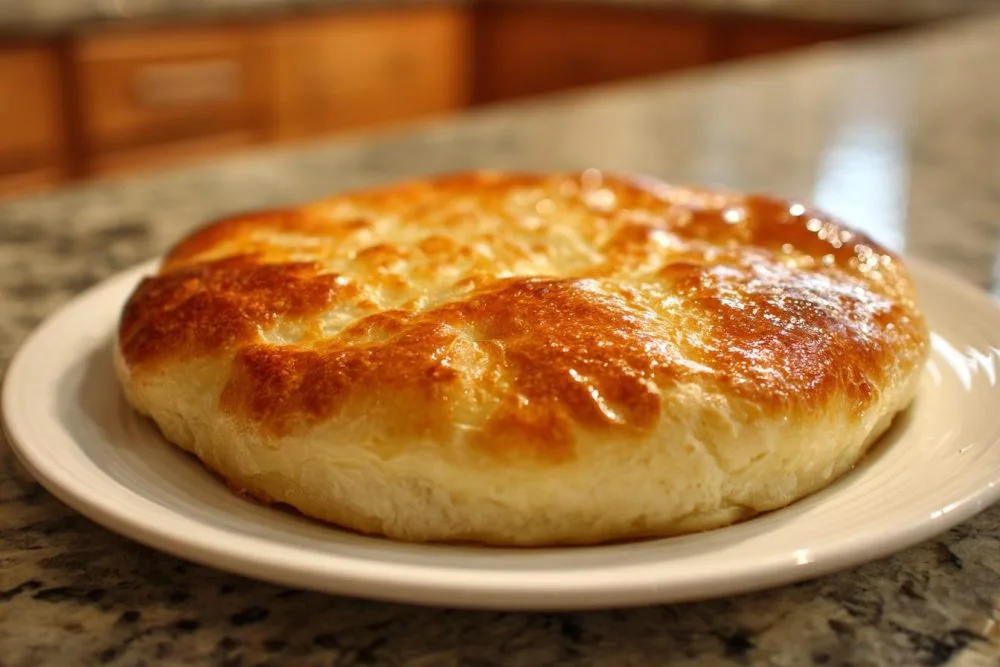
Skillet-Baked No-Oven Turkish Bread
Craving fresh bread without an oven? This No-Oven Turkish Bread delivers soft, airy, golden perfection right from your skillet.
📝 Ingredients
👩🍳 Instructions
-
1In a large mixing bowl, combine the warm water, sugar, and active dry yeast. Stir gently and let sit for 5-10 minutes until foamy, indicating the yeast is active.
-
2Add the 2 tablespoons of olive oil and sea salt to the yeast mixture. Gradually add the flour, one cup at a time, mixing with a wooden spoon or your hands until a shaggy dough forms and pulls away from the sides of the bowl.
-
3Turn the dough out onto a lightly floured surface. Knead for 5-7 minutes until the dough is smooth and elastic. It should be slightly tacky but not overly sticky.
-
4Lightly grease the mixing bowl with a little olive oil. Place the dough in the bowl, turning once to coat. Cover with a clean kitchen towel or plastic wrap and let rise in a warm, draft-free place for 1 to 1.5 hours, or until doubled in size.
-
5Gently punch down the risen dough to release the air. Transfer to a lightly floured surface and divide into 6-8 equal pieces.
-
6Roll each piece of dough into a smooth ball, then flatten with a rolling pin into a round disc, about 1/4 inch thick and 6-8 inches in diameter. Place the flattened rounds on a lightly floured surface, cover with a towel, and let rest for 15-20 minutes.
-
7Heat a large, heavy-bottomed skillet (preferably cast iron) over medium-high heat until hot. Lightly brush the skillet with olive oil.
-
8Place one or two dough rounds in the hot skillet, ensuring not to overcrowd. Cook for 2-3 minutes per side, until golden brown, puffy, and cooked through. Press gently with a spatula if needed to ensure even contact and browning.
-
9Transfer cooked bread to a plate and cover with a clean kitchen towel to keep warm and soft while you cook the remaining pieces. Serve warm and enjoy!
💡 Notes
For best results, use a cast-iron skillet. If using whole wheat flour, substitute up to half the all-purpose flour; you may need to add a touch more water. Leftovers can be stored in an airtight container at room temperature for 2-3 days or frozen.


