
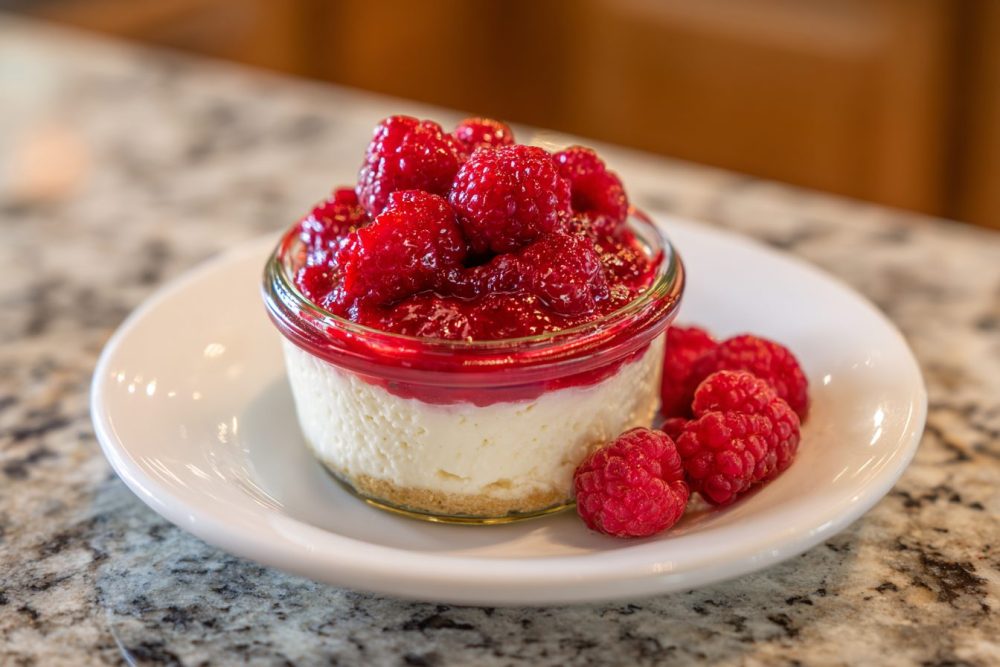
Ever had one of those days where you desperately crave something sweet, tangy, and utterly decadent, but the thought of turning on the oven, dirtying a million bowls, and waiting hours for it to chill just feels like too much? Yeah, I’ve been there. More times than I’d like to admit. That very scenario is how these healthy no-bake cheesecake in a jar with raspberry sauce on top came to be – a pure, unadulterated craving for comfort without the fuss.
- Why These Raspberry Cheesecake Jars Are a Game Changer
- Gather Your Ingredients for Layered Goodness
- Crafting Your Delicious Cheesecake Jars: Step-by-Step
- Step 1: Get the Raspberry Sauce Simmering
- Step 2: Assemble the Crunchy Base
- Step 3: Whip Up the Creamy Filling
- Step 4: Layer and Chill
- Common Questions About These Delightful Jars
- Can I make these ahead of time?
- What if I don’t have a food processor?
- Can I use different fruits for the topping?
- How long do these cheesecake jars last?
- Can I make these dairy-free or vegan?
- Variations to Spark Your Imagination
- Serving Suggestions & Perfect Pairings
- Storage Tips for Lasting Enjoyment
- Bringing It All Together: A Dessert That Delivers
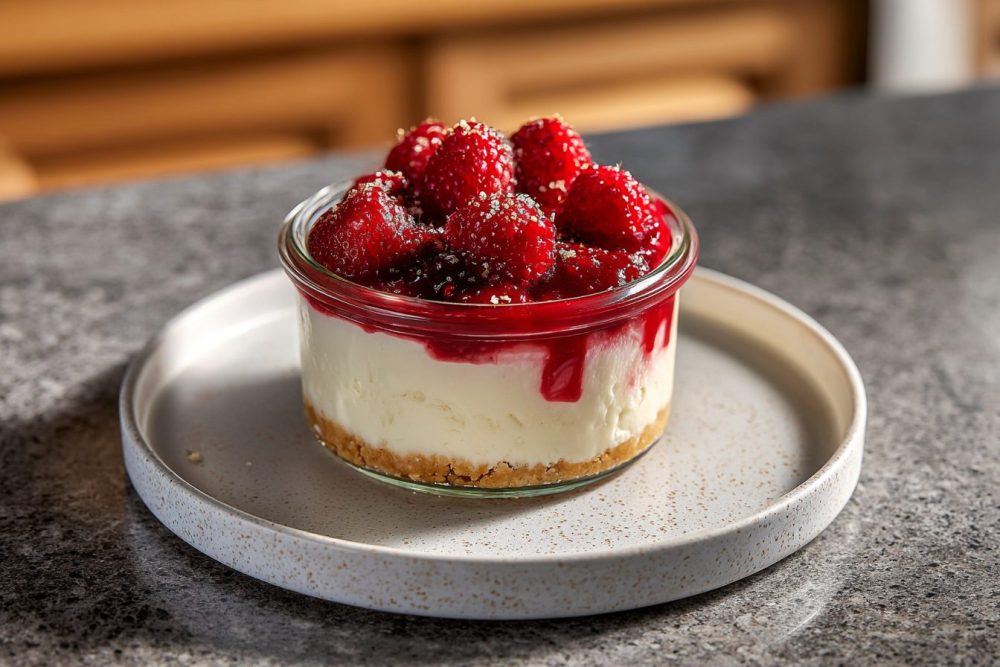
It’s a dessert that whispers sweet nothings about creamy textures and vibrant fruit, all while keeping things surprisingly light and wholesome. Seriously, these little jars are my secret weapon for satisfying a sweet tooth without the guilt. They’re perfect for individual portions, meaning no more battling over the last slice of cheesecake – everyone gets their own delightful experience.
What makes them so special isn’t just the ease; it’s the beautiful balance of flavors and textures. You get that satisfying crunch from the crust, the smooth, rich tang of the cheesecake filling, and then a burst of bright, sweet-tart raspberry sauce that ties it all together beautifully. Plus, they look absolutely adorable, making them fantastic for dinner parties or brunch.
Why These Raspberry Cheesecake Jars Are a Game Changer
Let’s be honest, sometimes “healthy dessert” can sound like an oxymoron, or worse, a euphemism for “flavourless cardboard.” Not here, friends! The beauty of this healthy no-bake cheesecake in a jar with raspberry sauce on top lies in its clever ingredient swaps that don’t compromise on taste or texture. We’re leaning on Greek yogurt for that classic tangy creaminess, which also boosts the protein content, keeping you feeling satisfied longer.
Instead of a sugar-laden crust, we’re using wholesome oats and nuts, bound together with a touch of natural sweetness. This provides a delightful crunch that perfectly contrasts the smooth filling. And the raspberry sauce? Pure fruit magic, with just a hint of maple syrup to coax out its natural sweetness, making it both vibrant and incredibly fresh. It’s a dessert that truly nourishes while indulging your senses.
The Magic of No-Bake Desserts
Beyond the health benefits, the “no-bake” aspect is a huge win. Especially during warmer months, who wants to fire up the oven and heat up the entire kitchen? These jars come together quickly with minimal effort, making them an ideal choice for busy weeknights or impromptu gatherings. Just a little chilling time, and you’re good to go.
They’re also fantastic for meal prepping. You can assemble a batch on Sunday, and have a delicious, portion-controlled dessert ready for several days. This makes sticking to healthier eating habits so much easier when you have something delicious to look forward to.
Gather Your Ingredients for Layered Goodness
Creating these individual healthy no-bake cheesecake in a jar with raspberry sauce on top doesn’t require a long list of obscure ingredients. Many of these you might already have in your pantry or fridge! We’re focusing on fresh, wholesome components to build layers of flavor and texture.
For the Crunchy Base
- 1 cup rolled oats: Not instant! Old-fashioned rolled oats give the best texture.
- 1/2 cup raw almonds: Or pecans, walnuts, or a mix.
- 2 tablespoons melted coconut oil: Helps bind the crust and adds a subtle richness.
- 2 tablespoons maple syrup: For natural sweetness. Adjust to your preference.
- 1/4 teaspoon sea salt: A pinch enhances all the other flavors.
For the Creamy Cheesecake Filling
- 16 oz (2 blocks) cream cheese, softened: Full-fat works best for that classic creamy texture, but a light version can be used.
- 1 cup plain Greek yogurt: Full-fat or 2% for extra creaminess and protein.
- 1/2 cup maple syrup: Our natural sweetener. Honey can also be used.
- 1 teaspoon vanilla extract: Pure vanilla adds warmth and depth.
- 1 tablespoon lemon juice: Essential for that signature cheesecake tang.
For the Vibrant Raspberry Topping
- 2 cups fresh or frozen raspberries: If using frozen, no need to thaw.
- 1-2 tablespoons maple syrup: To taste, depending on the sweetness of your berries.
- 1 tablespoon lemon juice: Brightens the sauce and cuts through the sweetness.
Crafting Your Delicious Cheesecake Jars: Step-by-Step
Ready to transform these simple ingredients into something truly special? Follow along, and you’ll have these delightful jars chilling in no time. The process is straightforward, but each step builds on the last to create a harmonious dessert.
Step 1: Get the Raspberry Sauce Simmering
In a small saucepan, combine your raspberries, 1 tablespoon of maple syrup, and 1 tablespoon of lemon juice. Bring the mixture to a gentle simmer over medium heat, stirring occasionally. As the raspberries break down, they’ll release their juices and thicken slightly. This usually takes about 5-7 minutes.
Tip: If you prefer a completely smooth sauce, press the cooked raspberries through a fine-mesh sieve to remove the seeds. I often leave some seeds for texture, but it’s totally up to you! Taste and add more maple syrup if needed. Set aside to cool completely.
Step 2: Assemble the Crunchy Base
While the sauce cools, prepare your crust. In a food processor, combine the rolled oats, almonds, 2 tablespoons of maple syrup, melted coconut oil, and sea salt. Pulse until the mixture resembles a coarse, sticky meal. You want it to hold together when pressed.
Divide this mixture evenly among four (8-ounce) mason jars or small dessert glasses. Press the mixture firmly into the bottom of each jar using the back of a spoon or your fingertips. This creates a solid foundation for your cheesecake.
Step 3: Whip Up the Creamy Filling
In a large mixing bowl, beat the softened cream cheese with an electric mixer until smooth and creamy. This is crucial for a lump-free filling. Gradually beat in the Greek yogurt, 1/2 cup of maple syrup, vanilla extract, and lemon juice until everything is well combined and fluffy. Scrape down the sides of the bowl as needed to ensure all ingredients are incorporated.
The mixture should be thick and lusciously smooth. Avoid overmixing once everything is combined, as this can incorporate too much air.
Step 4: Layer and Chill
Carefully spoon or pipe the cheesecake filling over the crust in each jar, dividing it evenly. Smooth the top gently with the back of a spoon. Now for the hard part: waiting! Place the jars in the refrigerator for at least 4 hours, or ideally overnight, to allow the cheesecake to set firmly. This chilling time is essential for the structure and flavor to fully develop.
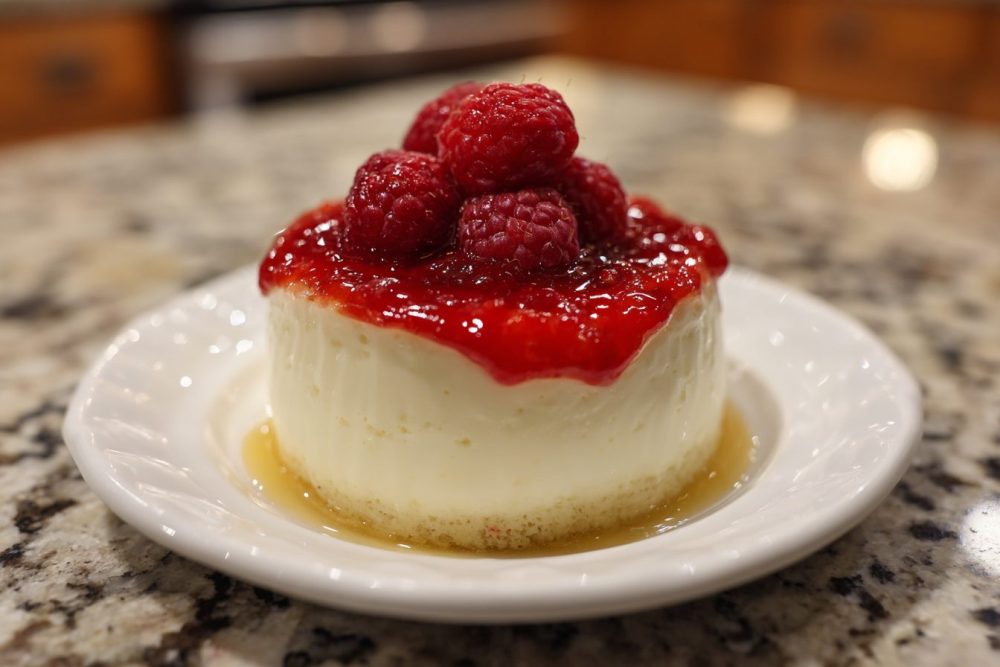
Once the cheesecake is firm, spoon the cooled raspberry sauce generously over the top of each jar. You can serve them immediately or keep them chilled until showtime.
Common Questions About These Delightful Jars
Even simple recipes can spark a few questions, especially when you’re making them for the first time or trying to adapt them. Here are some common queries I get about healthy no-bake cheesecake in a jar with raspberry sauce on top.
Can I make these ahead of time?
Absolutely! In fact, these jars are even better when made a day in advance. The flavors have more time to meld, and the cheesecake sets up perfectly. Just store them in the refrigerator, covered. Add the raspberry sauce right before serving for the freshest look and taste, or add it an hour or two before.
What if I don’t have a food processor?
No food processor? No problem! You can crush the oats and almonds by placing them in a Ziploc bag and crushing them with a rolling pin or the bottom of a heavy pan. It will be a bit more rustic, but still delicious! For the filling, a hand mixer or even vigorous whisking works fine if your cream cheese is very soft.
Can I use different fruits for the topping?
Yes, definitely! This recipe is incredibly versatile. Blueberries, strawberries, blackberries, or even a mixed berry sauce would be fantastic. Just follow the same process for making the raspberry sauce, adjusting sweetness as needed for your chosen fruit. A peach compote or cherry topping would also be divine.
How long do these cheesecake jars last?
Stored properly in an airtight container in the refrigerator, these healthy no-bake cheesecake jars will last for up to 3-4 days. They’re perfect for meal prep, giving you a guilt-free treat throughout the week.
Can I make these dairy-free or vegan?
With a few simple substitutions, you can absolutely make these jars dairy-free or vegan! Use a plant-based cream cheese alternative and a thick, plain dairy-free yogurt (like coconut or almond-based Greek-style yogurt). Ensure your coconut oil and maple syrup are also vegan, which they typically are. The rest of the ingredients are plant-based.
Variations to Spark Your Imagination
While the raspberry version is a classic for a reason, these no-bake cheesecake jars are a fantastic canvas for other flavor explorations. Don’t be afraid to get creative once you’ve mastered the basic recipe!
Chocolate Lovers’ Dream
Add 1/4 cup of unsweetened cocoa powder to the cheesecake filling for a rich chocolate version. You could even swirl in some melted dark chocolate or sprinkle mini chocolate chips on top. For the crust, consider adding a tablespoon of cocoa powder there too.
Tropical Escape
Swap the lemon juice in the filling for lime juice and top with a mango or passion fruit puree. A sprinkle of shredded coconut on top of the crust or mixed into the filling would enhance the tropical vibes even further.
Nut Butter Bliss
Replace half of the cream cheese with an equal amount of your favorite nut butter (like peanut, almond, or cashew butter) for a nutty, protein-packed twist. A drizzle of extra nut butter on top would be a delicious addition.
Spiced Autumn Feels
In the fall, add a teaspoon of pumpkin pie spice to the cheesecake filling and top with a homemade apple compote. A dash of cinnamon in the crust would tie it all together beautifully.
Serving Suggestions & Perfect Pairings
These healthy no-bake cheesecake in a jar with raspberry sauce on top are delightful on their own, but a few garnishes can truly elevate them.
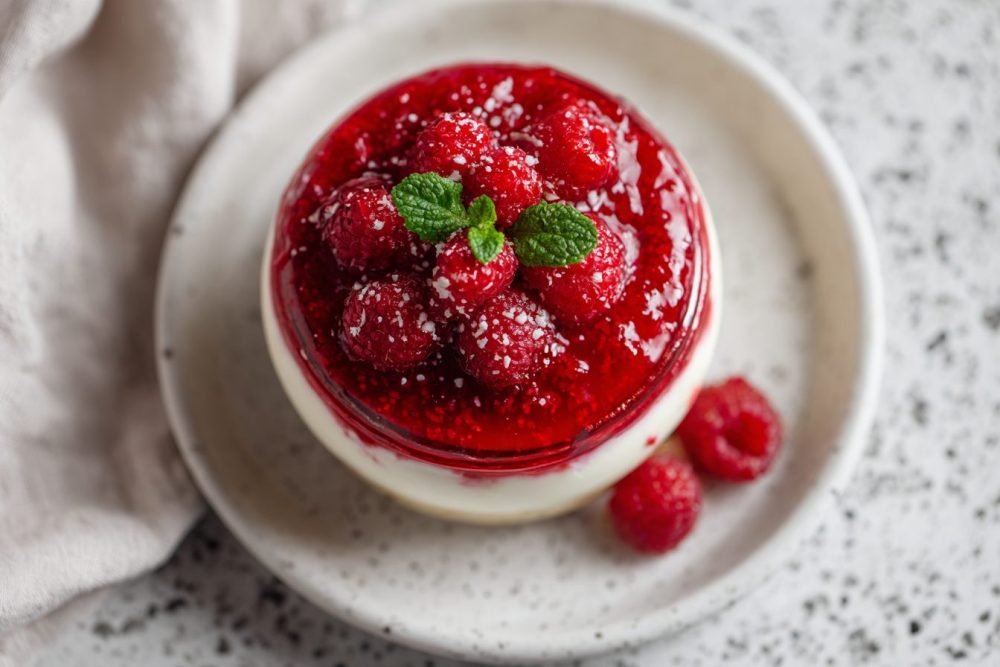
For a touch of elegance, sprinkle a few fresh raspberries and a sprig of fresh mint or a tiny basil leaf on top of each jar just before serving. A dusting of powdered sugar (or a healthier alternative) adds a beautiful finish.
They pair wonderfully with a light after-dinner coffee or a herbal tea. For a brunch spread, alongside fresh fruit and perhaps some whole-grain toast, they offer a sweet, satisfying component without being overly heavy.
Storage Tips for Lasting Enjoyment
As mentioned, these jars are excellent for making ahead. Once assembled, cover each jar tightly with its lid or plastic wrap and refrigerate for up to 3-4 days. This makes them perfect for grab-and-go desserts or a convenient treat throughout the week.
I wouldn’t recommend freezing the assembled jars as the texture of the cream cheese filling can change upon thawing, becoming a bit grainy. However, you can freeze the raspberry sauce separately in an airtight container for up to 3 months. Just thaw it in the refrigerator and stir before using.
Bringing It All Together: A Dessert That Delivers
There’s something truly satisfying about a dessert that looks impressive, tastes incredible, and secretly happens to be on the healthier side. These healthy no-bake cheesecake in a jar with raspberry sauce on top check all those boxes and more. They’re proof that you don’t need excessive sugar or complicated techniques to create a truly memorable sweet treat.
Whether you’re looking for a quick weeknight indulgence, a charming dessert for guests, or a convenient meal prep option, these jars are your answer. So go ahead, whip up a batch, and savor the simple pleasure of a wholesome, delicious dessert. Your taste buds (and your body) will thank you.
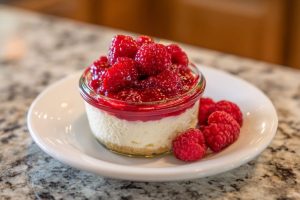
Luscious Raspberry No-Bake Cheesecake Jars
Healthy, easy no-bake cheesecake jars with a vibrant raspberry sauce, combining creamy texture with tangy freshness for a guilt-free treat.
📝 Ingredients
👩🍳 Instructions
-
1Prepare the Raspberry Sauce: In a small saucepan, combine raspberries, 1 tablespoon maple syrup, and 1 tablespoon lemon juice. Bring to a gentle simmer over medium heat, stirring occasionally, until berries break down and sauce thickens slightly (5-7 minutes). Taste and add more maple syrup if desired. Set aside to cool completely.
-
2Create the Crunchy Base: In a food processor, pulse rolled oats, almonds, 2 tablespoons maple syrup, melted coconut oil, and sea salt until a coarse, sticky meal forms. Divide evenly and firmly press into the bottom of four 8-ounce mason jars or dessert glasses.
-
3Whip the Cheesecake Filling: In a large mixing bowl, beat softened cream cheese with an electric mixer until smooth. Gradually beat in Greek yogurt, 1/2 cup maple syrup, vanilla extract, and lemon juice until well combined and fluffy. Scrape down bowl sides as needed.
-
4Layer and Chill: Spoon or pipe the cheesecake filling evenly over the crust in each jar. Smooth the top. Refrigerate for at least 4 hours, or preferably overnight, until set.
-
5Assemble and Serve: Once the cheesecake is firm, spoon the cooled raspberry sauce generously over the top of each jar. Garnish with fresh raspberries or mint if desired. Serve chilled.
💡 Notes
For a smoother raspberry sauce, press it through a fine-mesh sieve to remove seeds. Jars can be made 1-2 days in advance; add sauce just before serving. Store leftovers covered in the refrigerator for up to 3-4 days. For a vegan option, use plant-based cream cheese and Greek-style yogurt.


