

I used to think “cake” meant an hour of complicated steps, multiple bowls, and a kitchen that looked like a flour bomb went off. Then, one quiet Saturday morning, I stumbled upon a simple yogurt cake recipe. I made a few tweaks, baked it, and the sheer joy of pulling something so effortlessly delicious from the oven changed my perspective forever. This isn’t just *a* cake; it’s *the* cake for those moments you want something sweet, comforting, and wonderfully simple.
- Why This Yogurt Cake Will Steal Your Heart (and Your Oven)
- Gather Your Kitchen Crew: Ingredients for the Perfect Yogurt Cake
- Whipping Up Wonderful: Step-by-Step Yogurt Cake Creation
- Step 1: Prep Your Space & Preheat
- Step 2: Dry Ingredients Take Center Stage
- Step 3: The Wet Wonders Unite
- Step 4: Marrying the Mixtures
- Step 5: Into the Pan and Oven
- Step 6: Cool Down and Enjoy!
- Frequently Asked Questions About This Delightful Yogurt Cake
- Can I use Greek yogurt instead of regular whole milk yogurt?
- How long does this yogurt cake stay fresh?
- What are some great serving suggestions for this cake?
- Can I add fruit or chocolate chips to the batter?
- Can I make this cake in different sized pans?
- Make It Your Own: Variations & Flavor Twists
- Keeping it Fresh: Storage and Reheating Tips
- Why Oil is Our Best Friend in This Cake
Why This Yogurt Cake Will Steal Your Heart (and Your Oven)
What makes *this* yogurt cake stand out in a sea of recipes? It’s the harmonious balance of simplicity and sublime texture. Many cakes can be dry or overly dense, but the secret here is in the star ingredient: yogurt. It introduces an incredible moisture and a gentle tang that brightens the entire flavor profile without making it overtly sour. We’re talking about a cake that stays tender for days, if it even lasts that long! This isn’t a cake that demands fancy equipment or obscure ingredients. You likely have most of what you need in your pantry right now. That’s the beauty of it – approachable ingredients, spectacular results. It’s the kind of recipe you’ll commit to memory and pull out whenever you need a little bit of magic. And trust me, it delivers on magic.Gather Your Kitchen Crew: Ingredients for the Perfect Yogurt Cake
Before we get our hands delightfully messy, let’s make sure we have everything lined up. Good baking starts with good ingredients, and while this recipe is simple, quality always shines through.Your Main Players:
- All-Purpose Flour: Unbleached is my preference for a slightly more tender crumb, but regular works just fine.
- Granulated Sugar: For that perfect touch of sweetness.
- Baking Powder & Baking Soda: Our dynamic duo for lift and a beautifully airy texture.
- Salt: A pinch enhances all the other flavors. Don’t skip it!
- Large Eggs: Room temperature eggs incorporate better and create a more uniform batter.
- Plain Whole Milk Yogurt: This is our superstar! Full-fat yogurt contributes richness and unparalleled moisture. Greek yogurt can work in a pinch, but might make the cake a little denser.
- Neutral Oil: Vegetable, canola, or grapeseed oil are perfect. It keeps the cake incredibly moist without adding extra flavor.
- Vanilla Extract: Pure vanilla is non-negotiable for that classic, comforting aroma.
Optional Flavor Boosters:
- Lemon Zest: For an extra bright, sunny note that complements the yogurt beautifully. About a tablespoon is perfect.
- Almond Extract: If you’re feeling a little fancy, a quarter teaspoon adds a lovely depth.
Whipping Up Wonderful: Step-by-Step Yogurt Cake Creation
Ready to get baking? This is where the magic happens. Remember, baking should be fun, not stressful. Take your time, enjoy the process, and soon you’ll have a delightful yogurt cake filling your kitchen with an irresistible aroma.Step 1: Prep Your Space & Preheat
First things first, let’s get that oven ready. Preheat your oven to 350°F (175°C). Grab an 8 or 9-inch round cake pan. Grease it well with butter or cooking spray, then dust with a little flour. Tap out any excess. This ensures your beautiful cake slides out effortlessly.
Step 2: Dry Ingredients Take Center Stage
In a large mixing bowl, whisk together your flour, granulated sugar, baking powder, baking soda, and salt. Make sure there are no lumps and everything is thoroughly combined. This initial whisking helps distribute the leaveners evenly, which is key for a consistent rise.
Step 3: The Wet Wonders Unite
In a separate, medium-sized bowl, whisk together the eggs, plain whole milk yogurt, neutral oil, and vanilla extract (and any optional extracts or zests you’re using). Whisk until everything is smoothly incorporated. Tip: Ensure your eggs are at room temperature for better emulsification with the other wet ingredients, leading to a smoother batter.
Step 4: Marrying the Mixtures
Now, pour the wet ingredients into the dry ingredients. Using a spatula, gently fold everything together until just combined. Be careful not to overmix! Overmixing develops gluten, which can lead to a tough cake. A few lumps are perfectly acceptable – even desirable – as long as there are no streaks of dry flour.
Step 5: Into the Pan and Oven
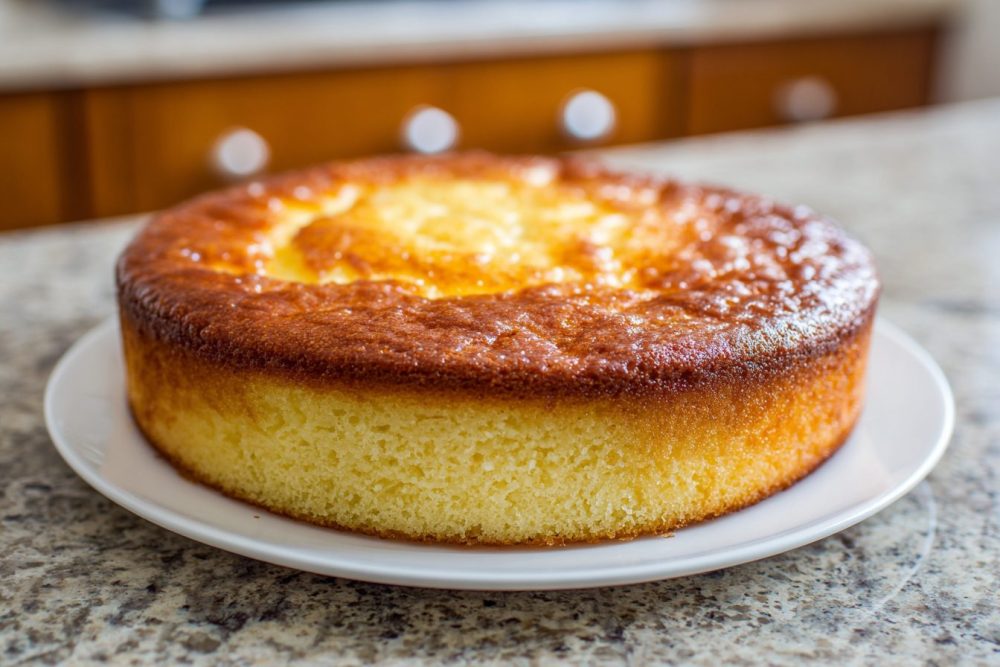
Pour your beautiful batter into the prepared cake pan. Give the pan a gentle tap on the counter a few times to release any large air bubbles. Pop it into your preheated oven and bake for 30-35 minutes, or until a wooden skewer or toothpick inserted into the center comes out clean. The top should be golden brown and spring back lightly when touched.
Step 6: Cool Down and Enjoy!
Once baked, remove the cake from the oven and let it cool in the pan on a wire rack for about 10-15 minutes. This allows the cake to set and prevents it from breaking when you invert it. After the initial cooling, carefully invert the cake onto the wire rack to cool completely. Resist the urge to cut into it too soon – patience is a virtue, especially when it comes to cake!
Frequently Asked Questions About This Delightful Yogurt Cake
Got questions? I’ve got answers! Here are some common queries that often pop up when baking this wonderful cake.Can I use Greek yogurt instead of regular whole milk yogurt?
While plain whole milk yogurt is preferred for its moisture content and lighter texture, you can use Greek yogurt. However, Greek yogurt is thicker, so your cake might be a bit denser. If you do use Greek yogurt, you might consider adding an extra tablespoon or two of milk to the batter to achieve a similar consistency.
How long does this yogurt cake stay fresh?
Stored properly at room temperature in an airtight container, this cake will stay wonderfully moist for up to 3-4 days. It’s also excellent slightly warmed!
What are some great serving suggestions for this cake?
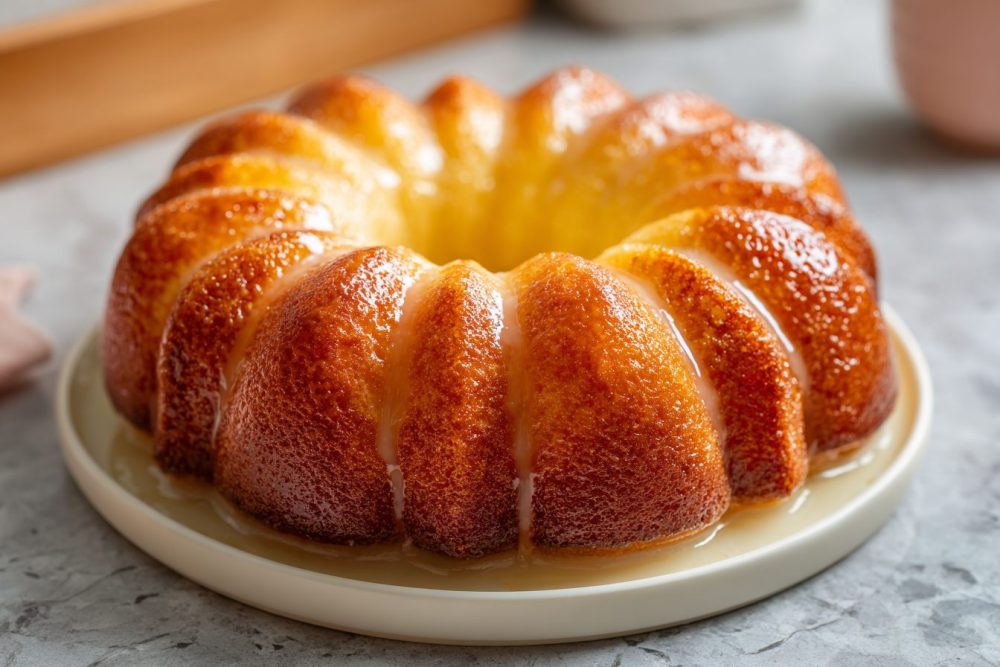
This cake is incredibly versatile! It’s fantastic on its own with a dusting of powdered sugar. You could also serve it with fresh berries, a dollop of whipped cream, a drizzle of honey, or even a simple lemon glaze.
Can I add fruit or chocolate chips to the batter?
Absolutely! This yogurt cake is a fantastic base for add-ins. Gently fold in about 1 cup of fresh berries (blueberries and raspberries are lovely), chocolate chips, or even a handful of chopped nuts after you’ve combined the wet and dry ingredients. If using fresh fruit, toss it lightly in a tablespoon of flour first to prevent it from sinking to the bottom.
Can I make this cake in different sized pans?
Yes, you can! For cupcakes, expect a baking time of around 20-25 minutes. For a loaf pan, it might take 45-50 minutes. Always keep an eye on it and use the toothpick test to determine doneness, as baking times will vary.
Make It Your Own: Variations & Flavor Twists
This basic yogurt cake recipe is a blank canvas just begging for your creative touch. Don’t be afraid to experiment once you’ve mastered the basic version!Citrus Zest Explosion:
Swap out the lemon zest for orange or lime zest. You can even add a touch of the corresponding juice (a tablespoon or two) for an extra citrusy kick. A simple glaze made with powdered sugar and citrus juice would be a perfect finish.
Spice It Up:
Add 1 teaspoon of ground cinnamon, a pinch of nutmeg, or even a touch of cardamom to the dry ingredients for a warm, spiced cake that’s perfect for autumn mornings.
Nutty Crunch:
Fold in 1/2 cup of chopped walnuts, pecans, or almonds into the batter for a delightful textural contrast. You can also sprinkle some on top before baking for a toasted finish.
Chocolate Lover’s Dream:
Stir in 1 cup of your favorite chocolate chips (dark, milk, or white!) or even swirl in some melted chocolate after pouring the batter into the pan for a marbled effect. A chocolate drizzle after baking is also always a good idea.
Fruity Fun:
Beyond berries, consider adding finely diced apples or pears. If using fruit with a higher water content, gently pat it dry before adding to the batter.
Keeping it Fresh: Storage and Reheating Tips
Once your glorious yogurt cake is baked and cooled, ensuring it stays delicious is key.At Room Temperature:
The best way to store this cake is in an airtight container at room temperature. This helps maintain its moisture and prevents it from drying out. A cake dome works wonderfully too. It should stay fresh and delightful for 3-4 days.
In the Refrigerator:
While not strictly necessary, if your kitchen is particularly warm or humid, or if you’ve added fresh fruit that might spoil quicker, you can refrigerate the cake. Just be aware that refrigeration can sometimes slightly dry out cakes. Bring slices to room temperature before serving for the best flavor and texture.
Freezing for Later:
Planning ahead? This yogurt cake freezes beautifully! Once completely cooled, wrap the entire cake (or individual slices) tightly in plastic wrap, then an additional layer of aluminum foil. It can be frozen for up to 2-3 months. Thaw overnight in the refrigerator, then bring to room temperature before serving. You can also gently warm individual slices for a few seconds in the microwave to bring back that freshly baked feel.
Why Oil is Our Best Friend in This Cake
You might notice this recipe calls for oil instead of butter. This is a deliberate choice for several reasons, and it’s a little trick that contributes significantly to the yogurt cake’s moist texture.Moisture Marvel:
Oil is 100% fat, while butter is about 80% fat and 20% water. Using oil means you’re introducing more fat and less water into the batter, resulting in a cake that’s incredibly moist and stays that way for longer. The oil coats the flour particles, preventing them from developing too much gluten, which can lead to a dry, tough cake.
Tender Crumb:
Because oil remains liquid at room temperature, it helps create a softer, more tender crumb that almost melts in your mouth. Butter, on the other hand, solidifies when cooled, which can make cakes baked with butter feel a bit firmer or denser once they’re no longer warm.
Flavor Neutrality:
A neutral oil allows the delicate flavor of the yogurt, vanilla, and any added zests to truly shine. Butter has a distinct flavor that, while delicious, might compete with the subtle notes we’re aiming for in this particular cake. It allows the star ingredients to truly be the star.
So, embrace the oil! It’s a key player in making this cake the moist, tender, and absolutely irresistible treat that it is.
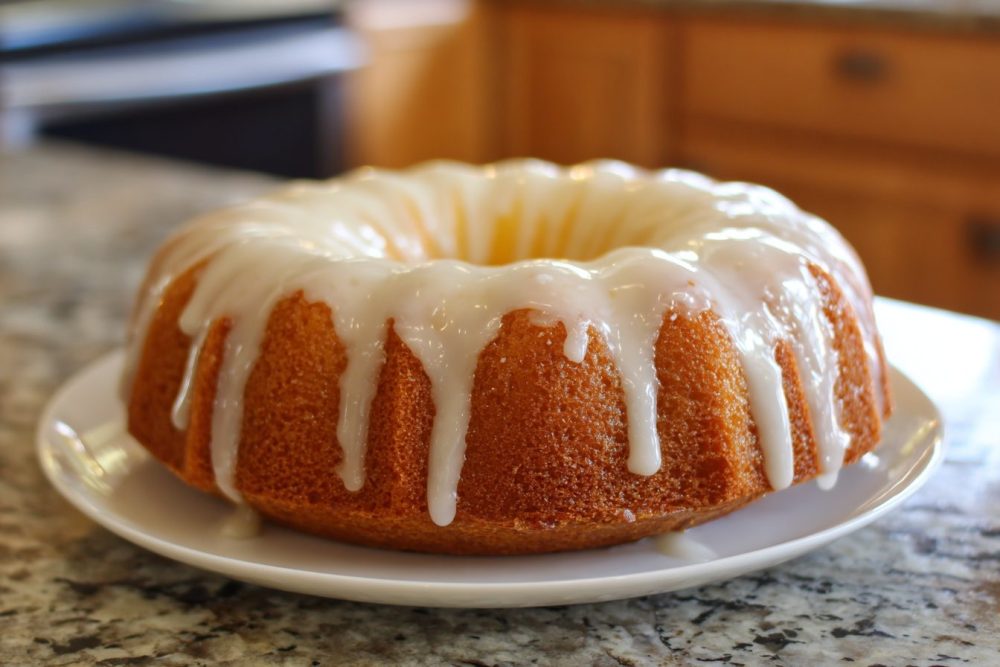
Super Moist Yogurt Cake
This simple, tender, and incredibly moist yogurt cake is your new go-to for a delightful treat any time of day.
📝 Ingredients
👩🍳 Instructions
-
1Preheat your oven to 350°F (175°C). Grease an 8 or 9-inch round cake pan thoroughly with butter or cooking spray, then dust with flour, tapping out any excess.
-
2In a large mixing bowl, whisk together the all-purpose flour, granulated sugar, baking powder, baking soda, and salt until well combined and no lumps remain.
-
3In a separate medium bowl, whisk together the room temperature eggs, plain whole milk yogurt, neutral oil, and vanilla extract (and lemon zest, if using) until smooth.
-
4Pour the wet ingredients into the dry ingredients. Using a spatula, gently fold until just combined. Be careful not to overmix; a few small lumps are fine, but ensure no dry flour streaks remain.
-
5Pour the batter into the prepared cake pan. Gently tap the pan on the counter a couple of times to release any large air bubbles.
-
6Bake for 30-35 minutes, or until the top is golden brown and a wooden skewer or toothpick inserted into the center comes out clean.
-
7Remove the cake from the oven and let it cool in the pan on a wire rack for 10-15 minutes. This allows it to set properly. After this, carefully invert the cake onto the wire rack to cool completely before slicing and serving.
💡 Notes
For an extra touch, dust with powdered sugar, or serve with fresh berries and a dollop of whipped cream. Store leftover cake in an airtight container at room temperature for up to 3-4 days to maintain its moisture. For variations, fold in 1 cup of blueberries or chocolate chips with the dry ingredients.


